

Private endpoints
Connect your services to Azure Private Link endpoints to eliminate public internet exposure
Tiger Cloud supports private connectivity through Azure Private Link. Once configured, applications in your Azure Virtual Network reach your service through a private endpoint on Microsoft's internal network, with no exposure to the public internet. This page walks you through provisioning the private endpoint in Azure, claiming it in Tiger Console, and attaching it to your service.
Prerequisites for this procedure
To follow these steps, you'll need:
- An Azure account with an active subscription.
- Permissions configured to create private endpoints.
- An Azure Virtual Network with a subnet for the resources you will connect to Tiger Cloud.
Set up a private endpoint connection
Take the following steps to connect your Tiger Cloud service to a Private Link endpoint.
- Copy the alias for your region
-
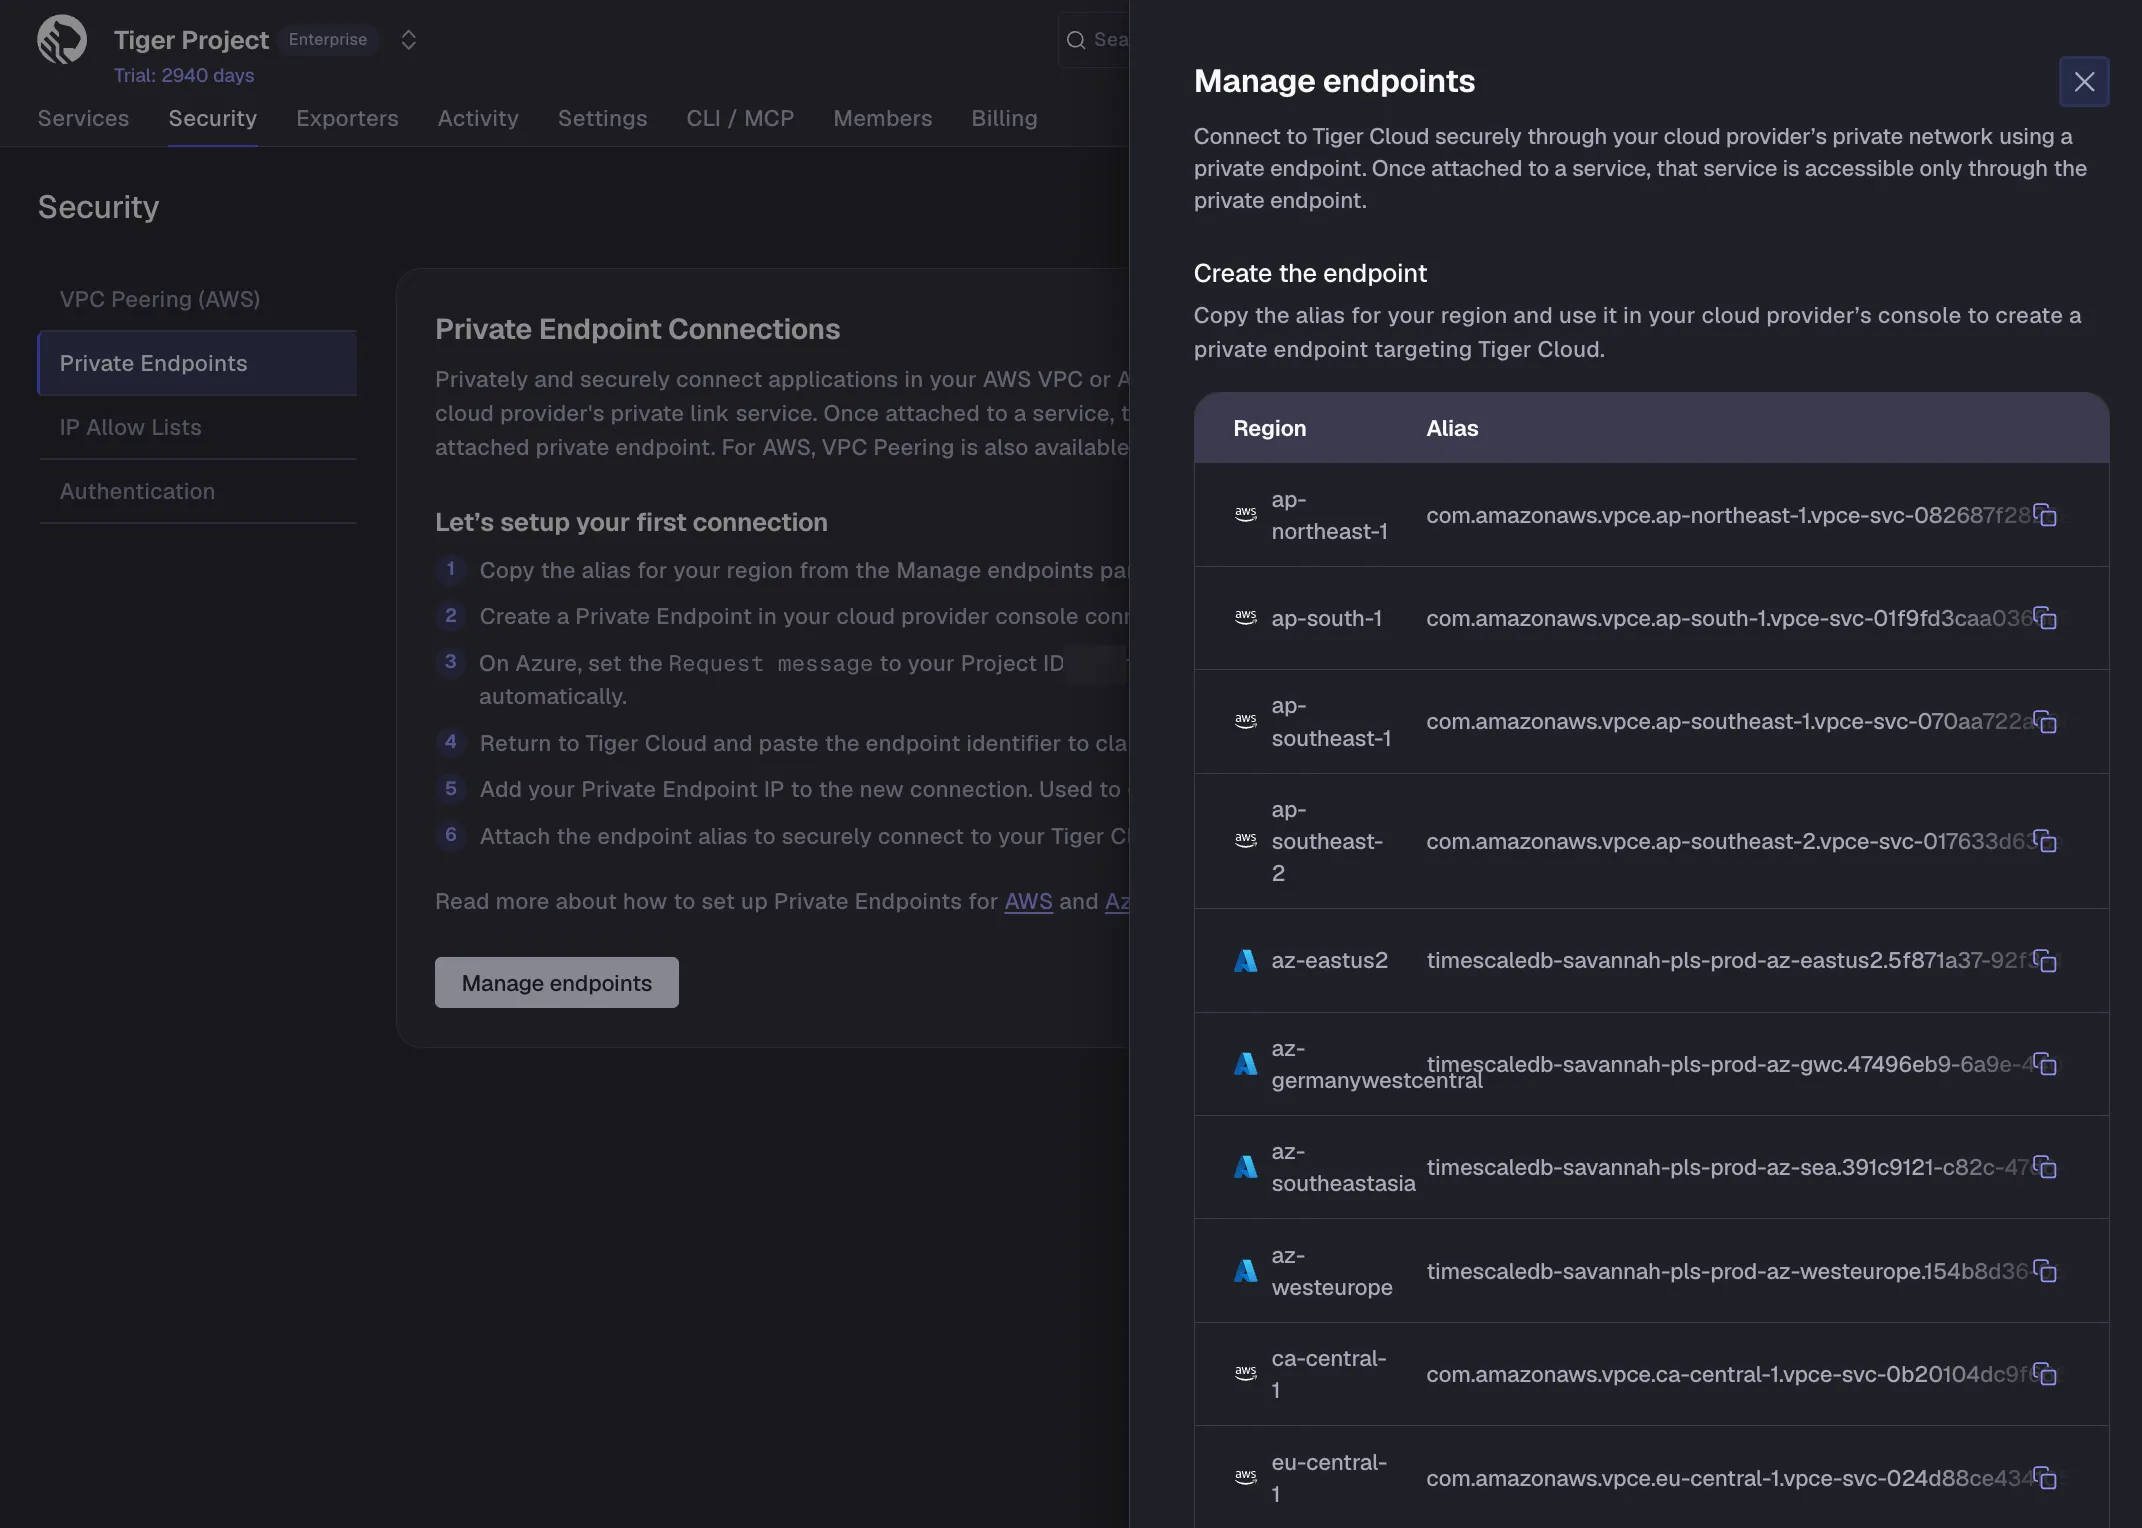
In Tiger Console, select
Security>Private Endpoints>Manage endpoints. -
Under
Create the endpoint, copy theAliasfor the region in which you need to create the connection. Choose the region closest to your Azure resources for optimal performance.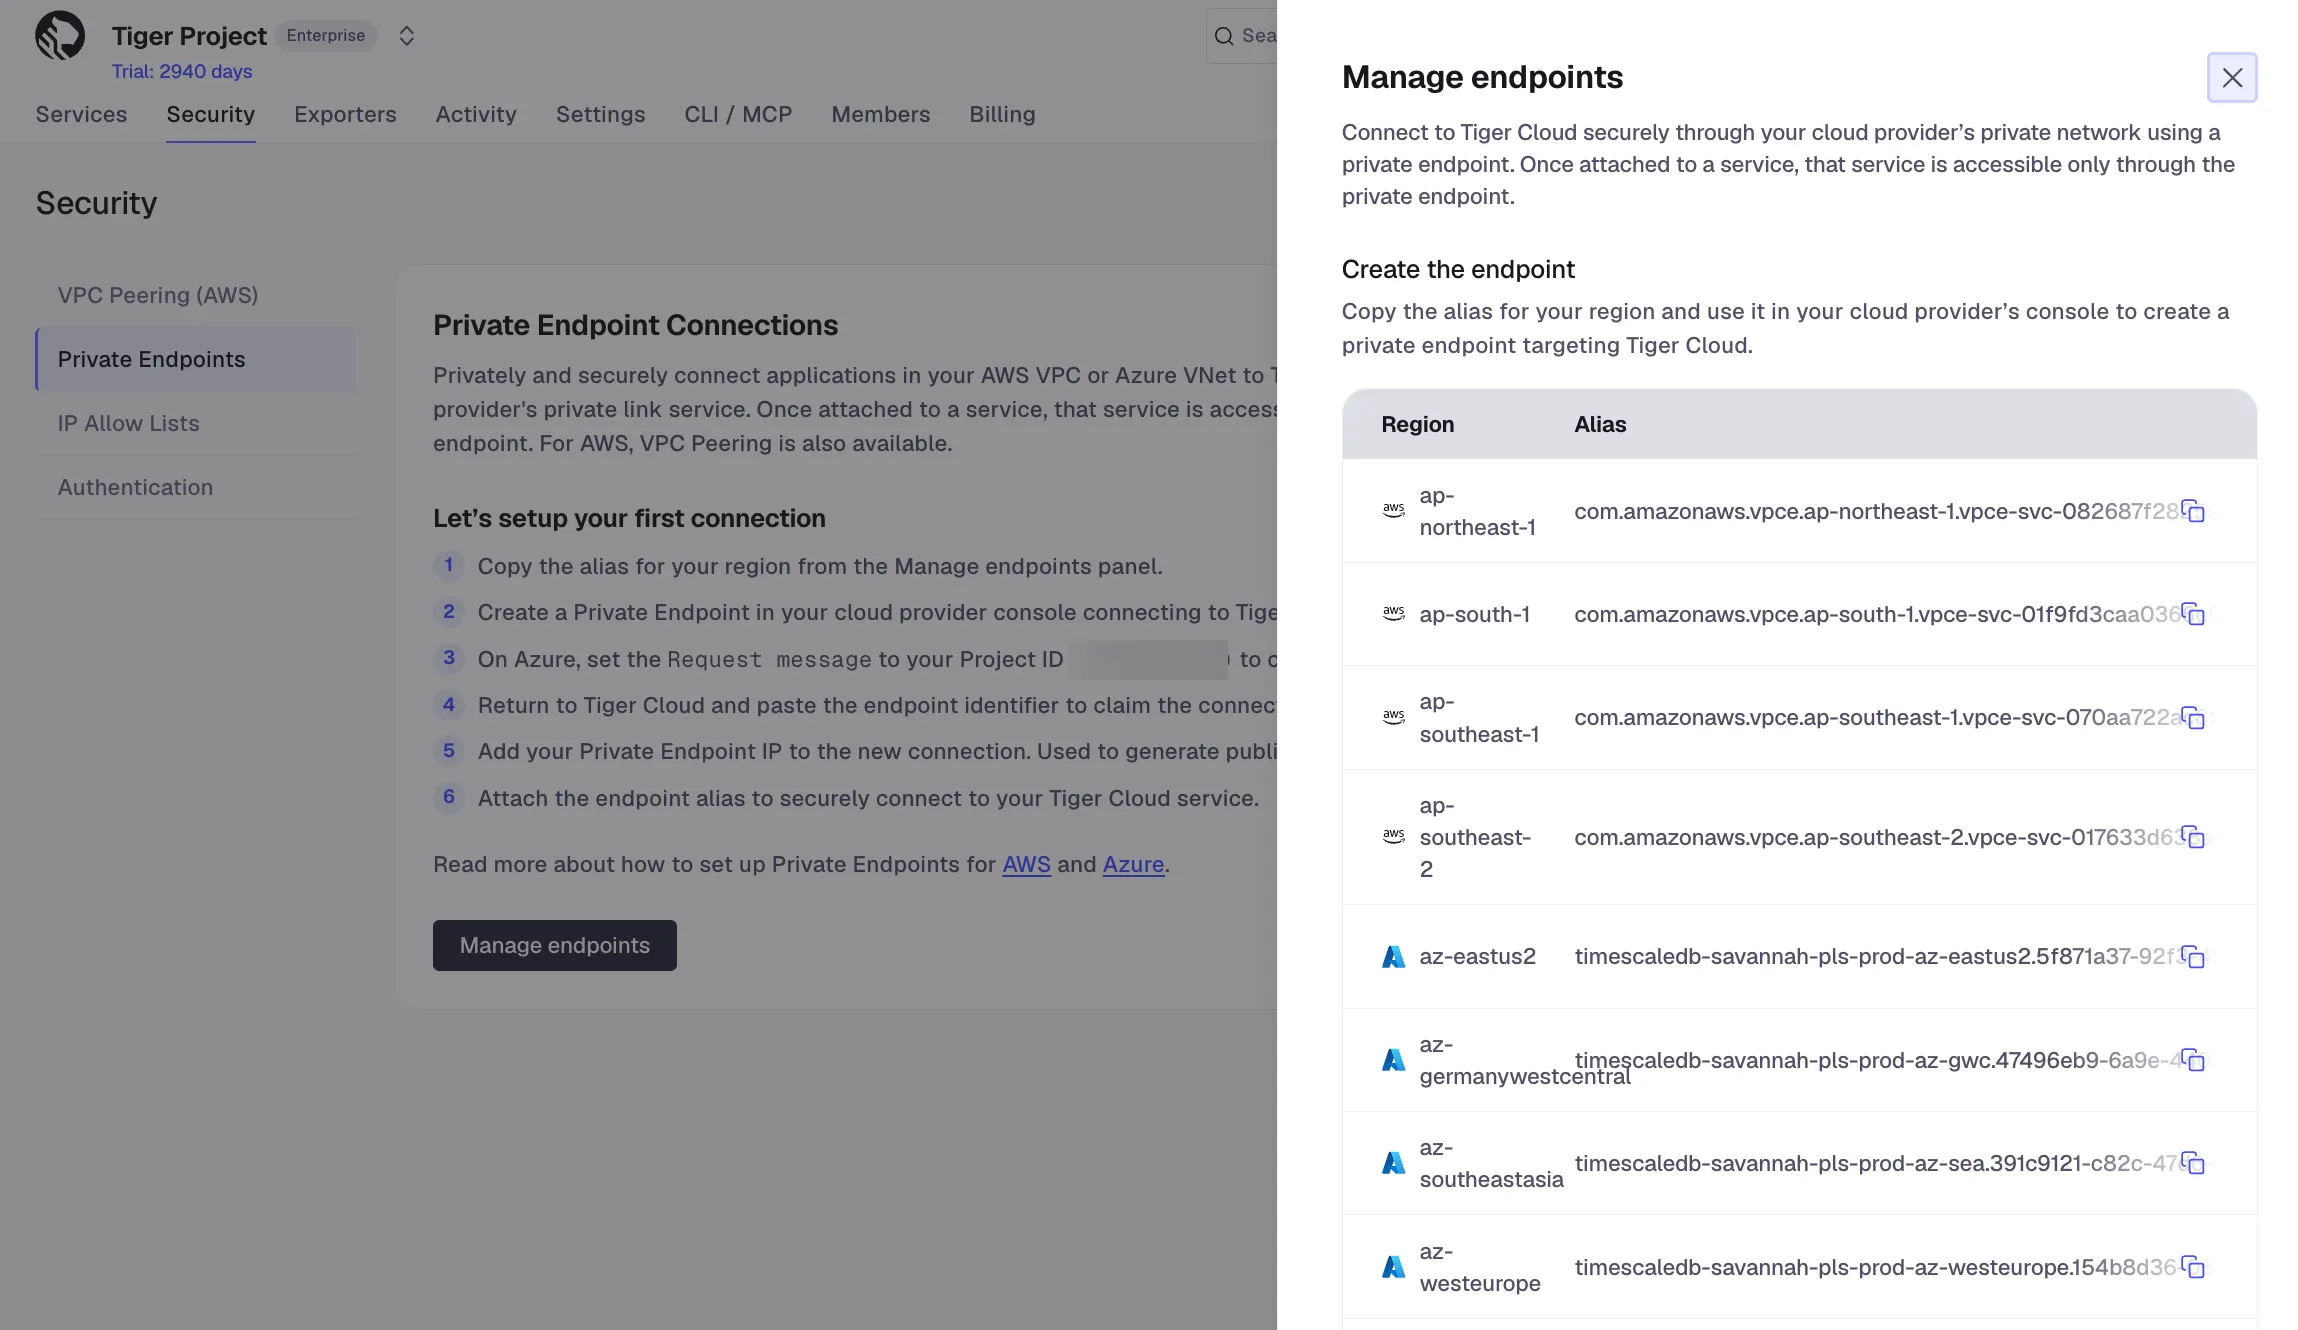
-
- Create a private endpoint in Azure
-
In Azure Portal, go to
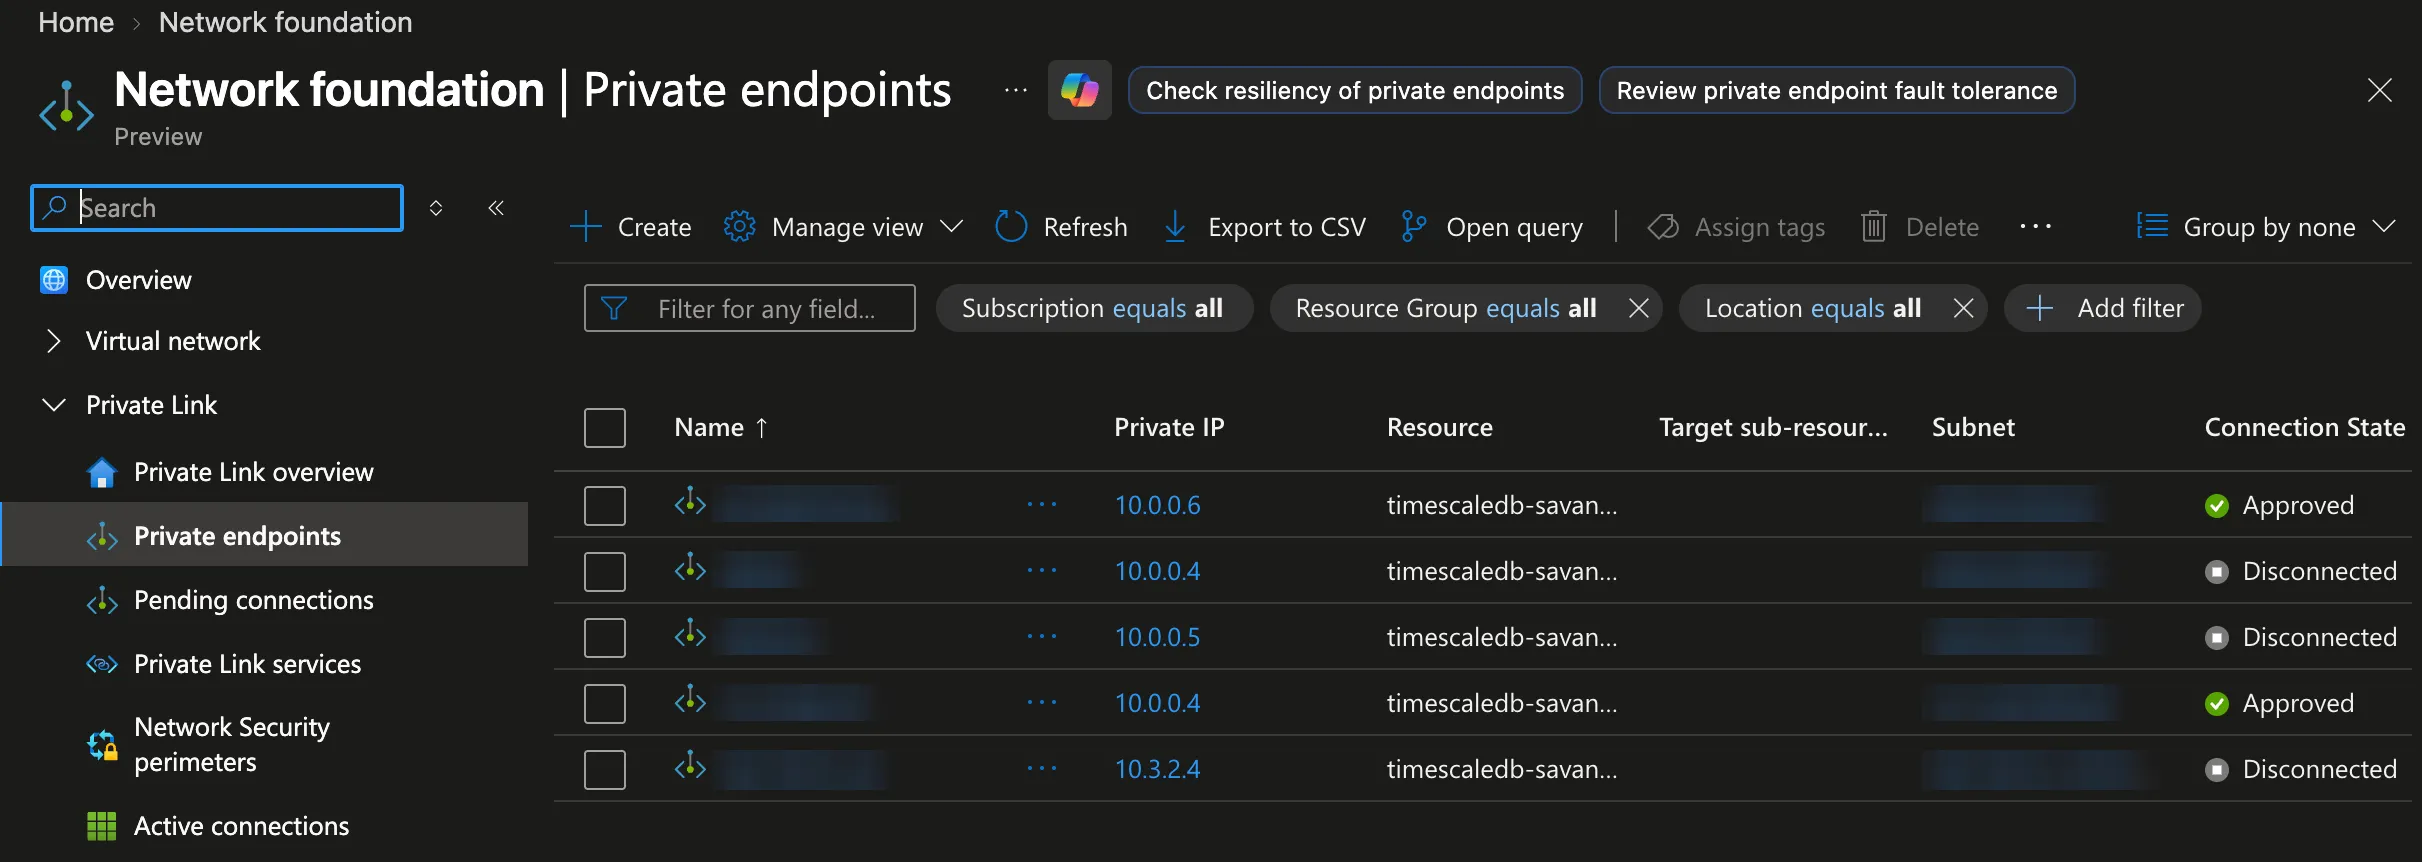
Private endpointsand clickCreate.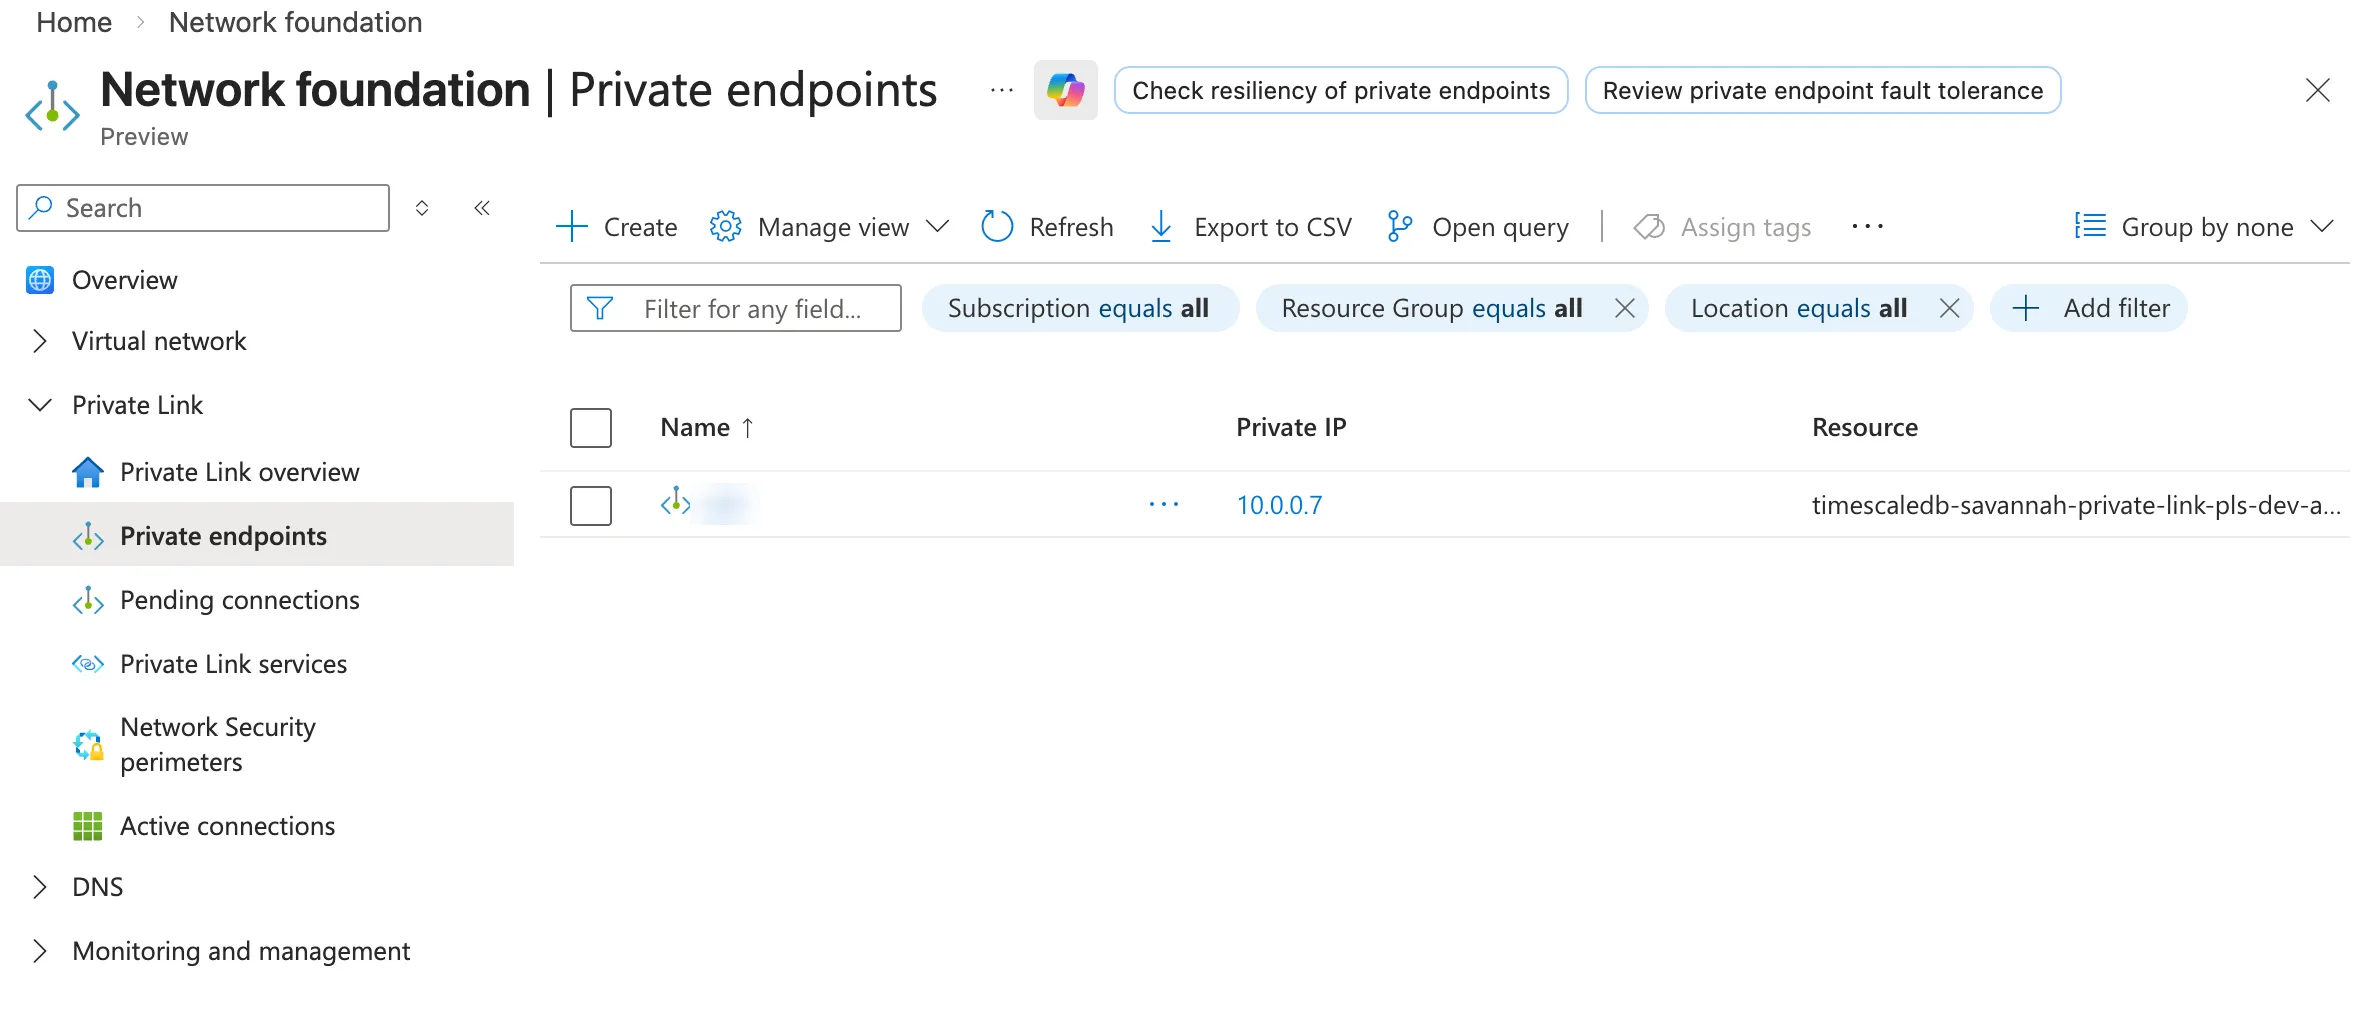
-
In
Subscription, select the subscription that contains the resources you want to connect to Tiger Cloud. -
In
Resource group, select an existing resource group or create a new one for your private endpoint. -
Provide a name for your endpoint.
-
Select the region where your Virtual Network is deployed, then click
Next: Resource. -
In
Connection method, selectConnect to an Azure resource by resource ID or alias. -
In
Resource ID or alias, paste the alias you have copied from Tiger Console. -
Leave
Request messageempty, then clickNext: Virtual Network. -
Select the Virtual Network that contains the resources you want to connect to Tiger Cloud, then choose the subnet where the endpoint's private IP will be created. Optionally select an application security group, then click
Next: DNS. -
Optionally configure private DNS integration and tags for your endpoint, then click
Next: Review + create. -
Review your config and click
Create. Azure creates your private endpoint. Wait for the deployment to succeed. -
Go to your private endpoint's
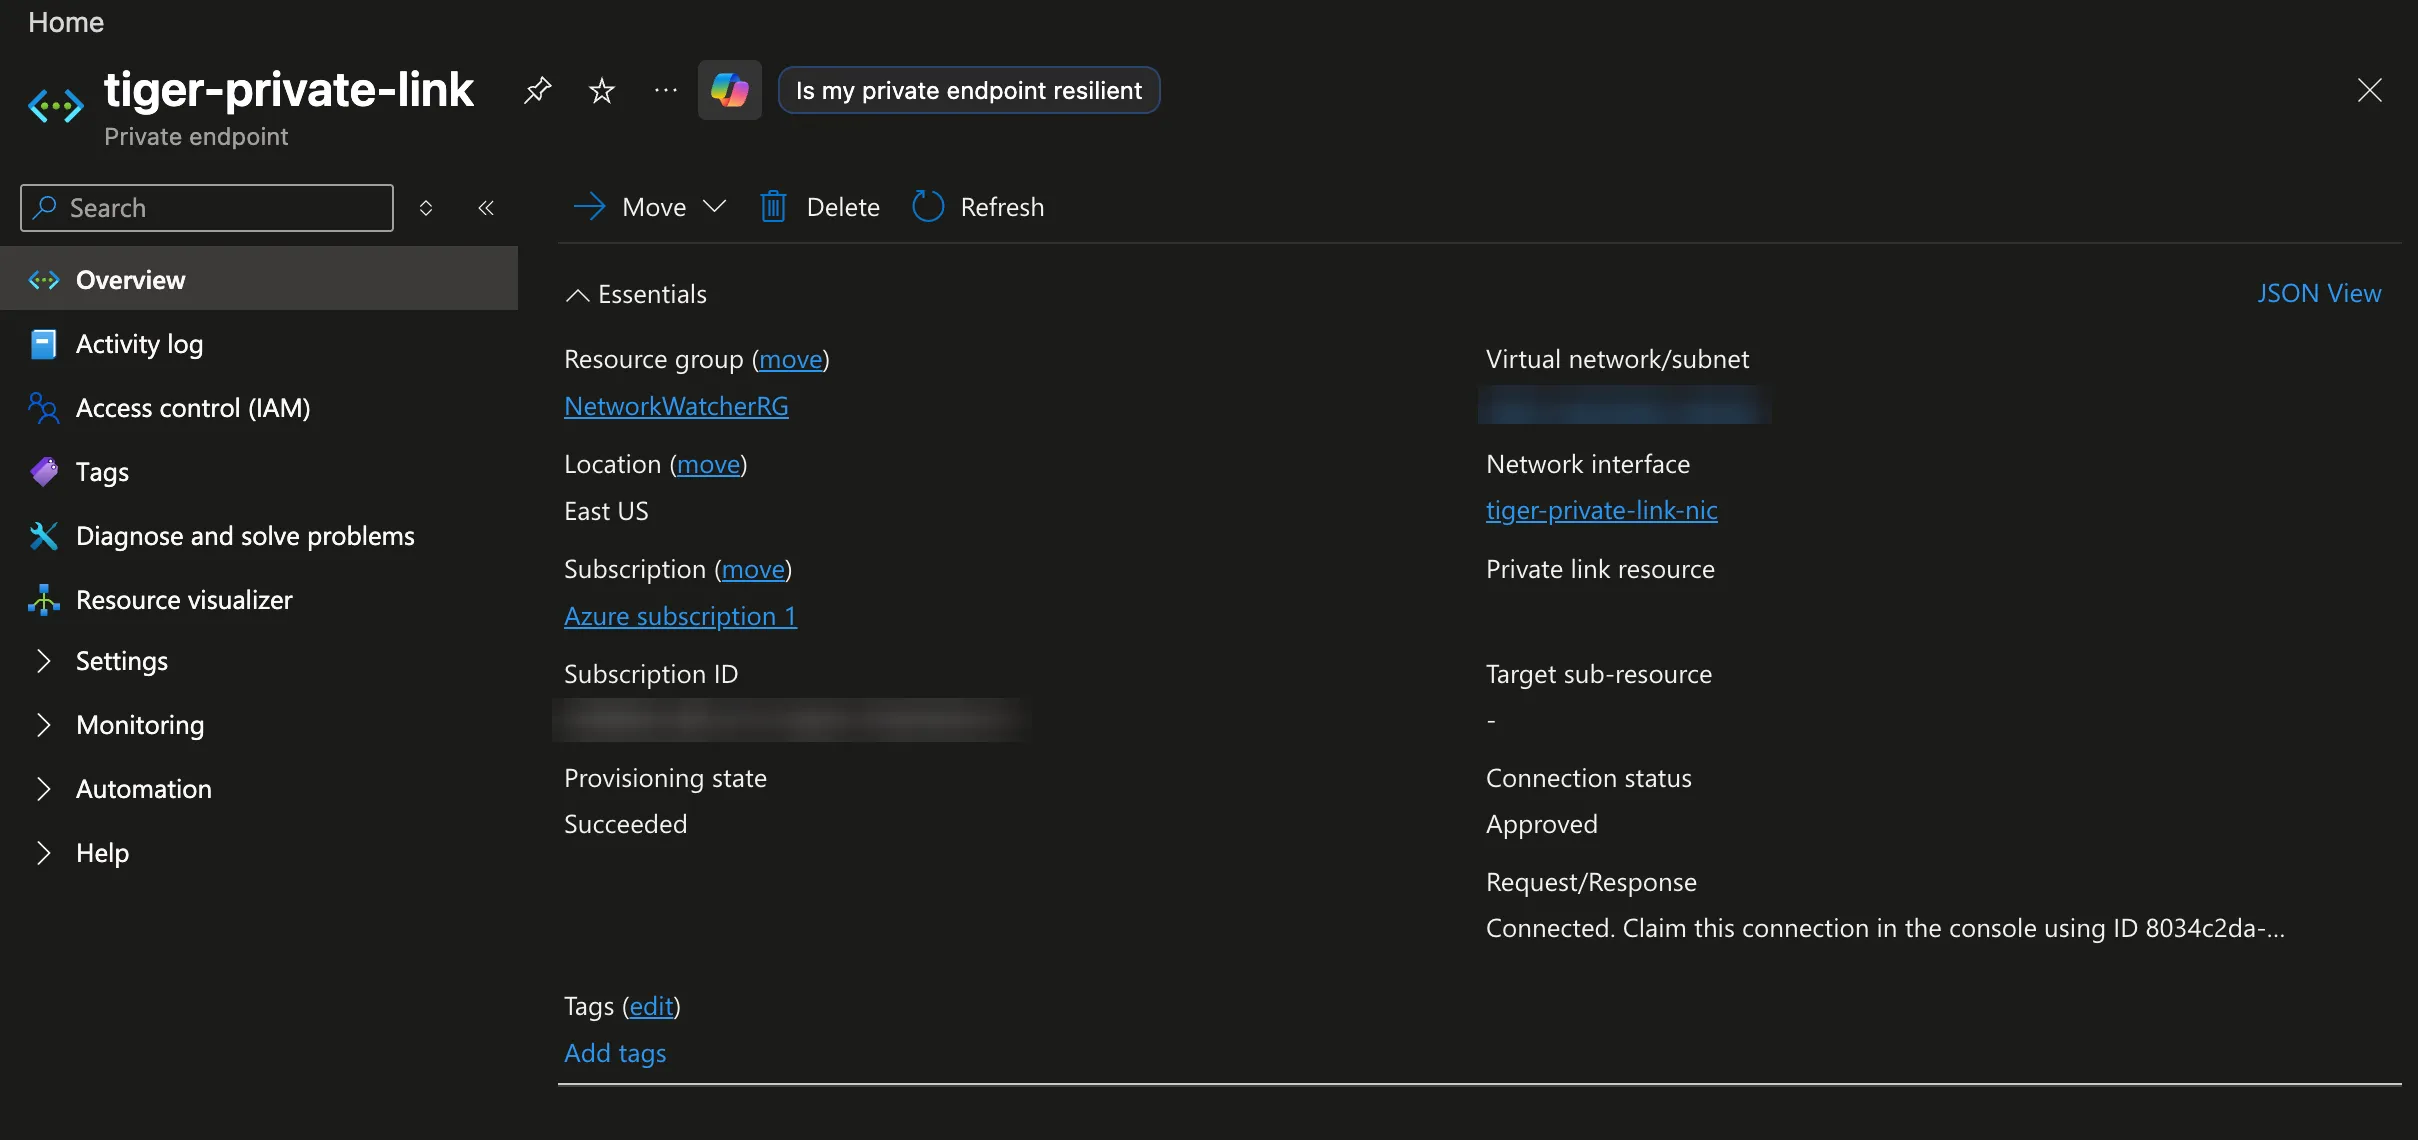
Overview. Once Tiger Cloud approves the connection, the connection status message readsConnected. Claim this connection in the console using ID <ID>. Copy this ID; you claim the connection with it.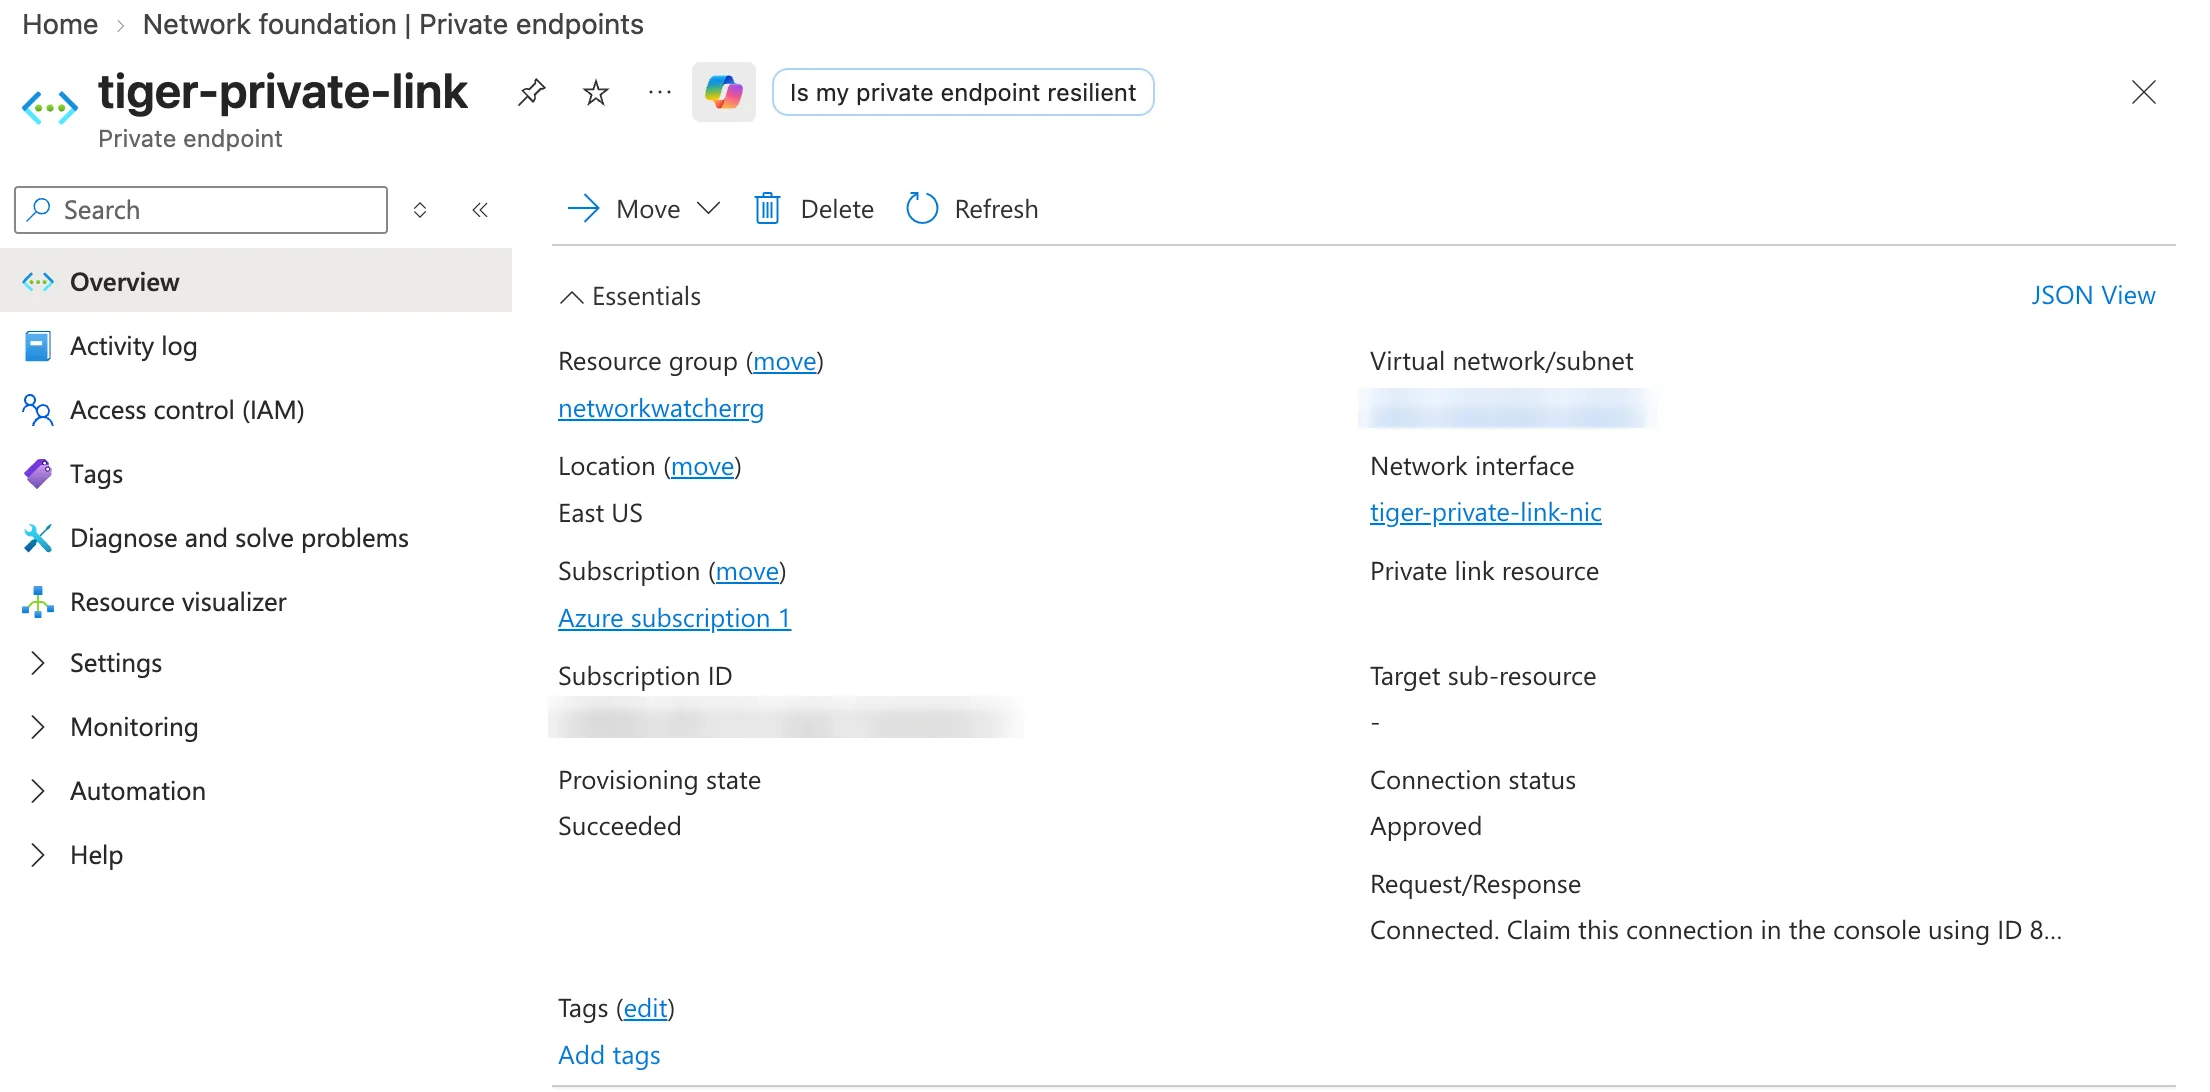 Note
NoteApproval takes up to a few minutes. The ID is your endpoint's
resourceGuid, so you can also read it fromJSON Viewunderpropertiesif you prefer. -
Go to
Private endpointsand copy the private endpoint IP from thePrivate IPcolumn.
-
- Claim the connection
-
In Tiger Console >
Security>Private Endpoints, clickManage endpoints. -
Under
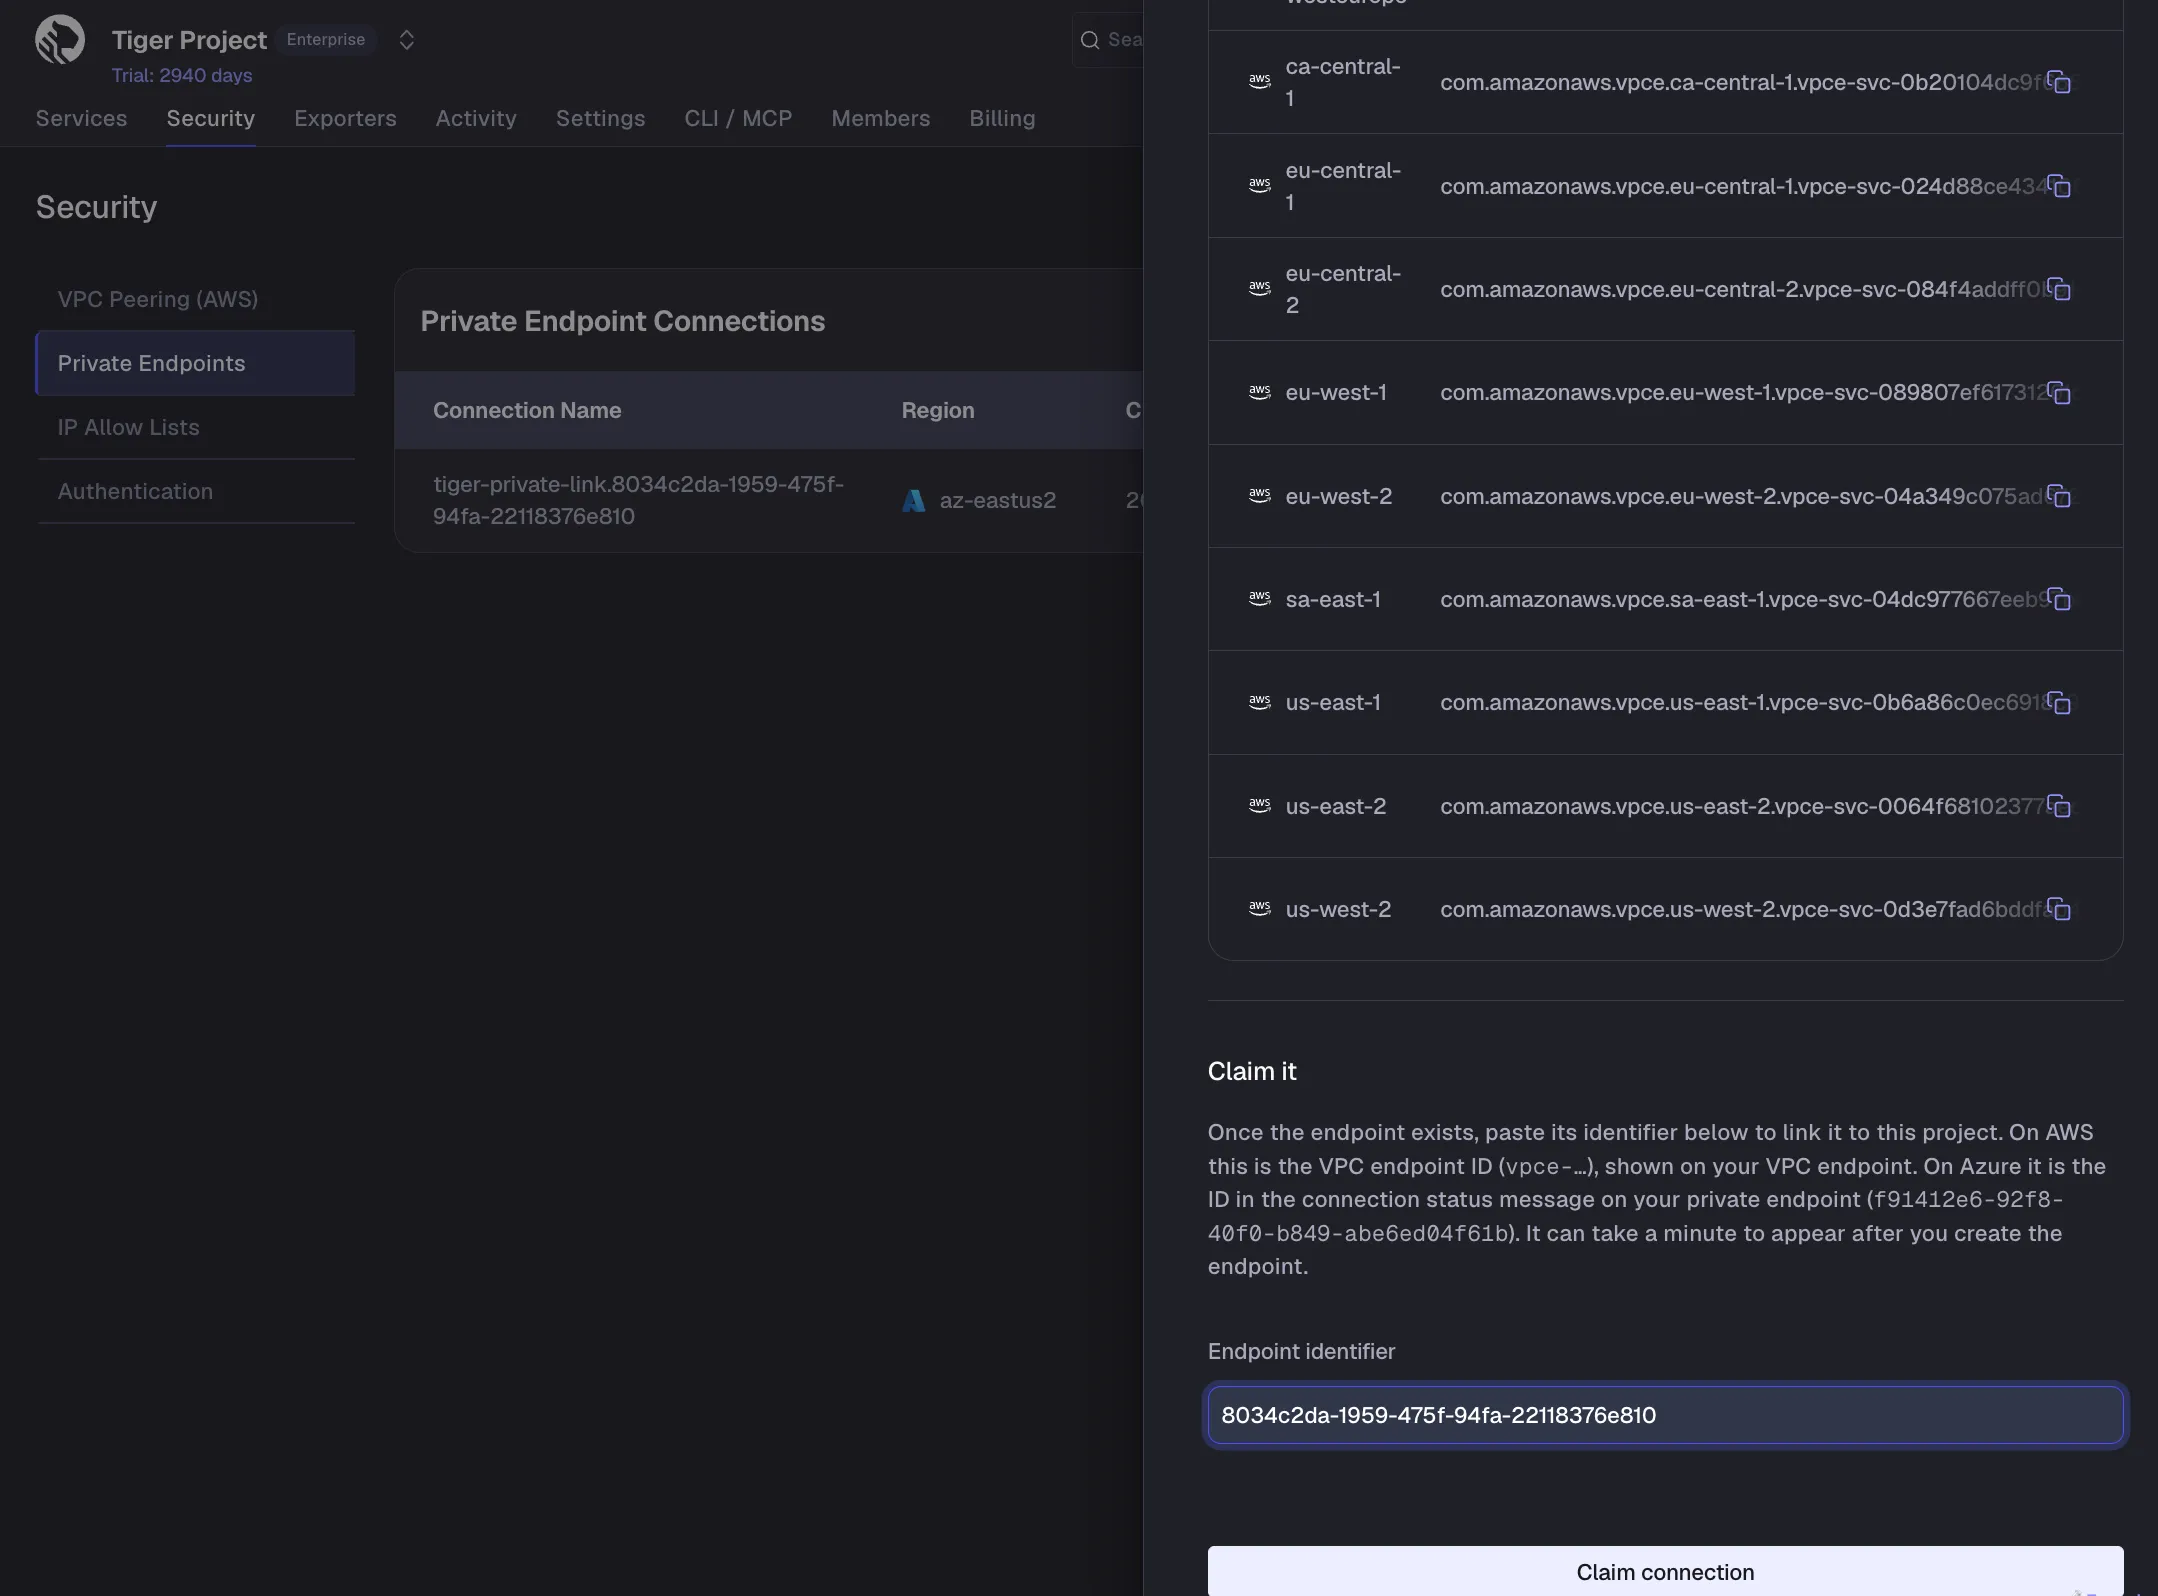
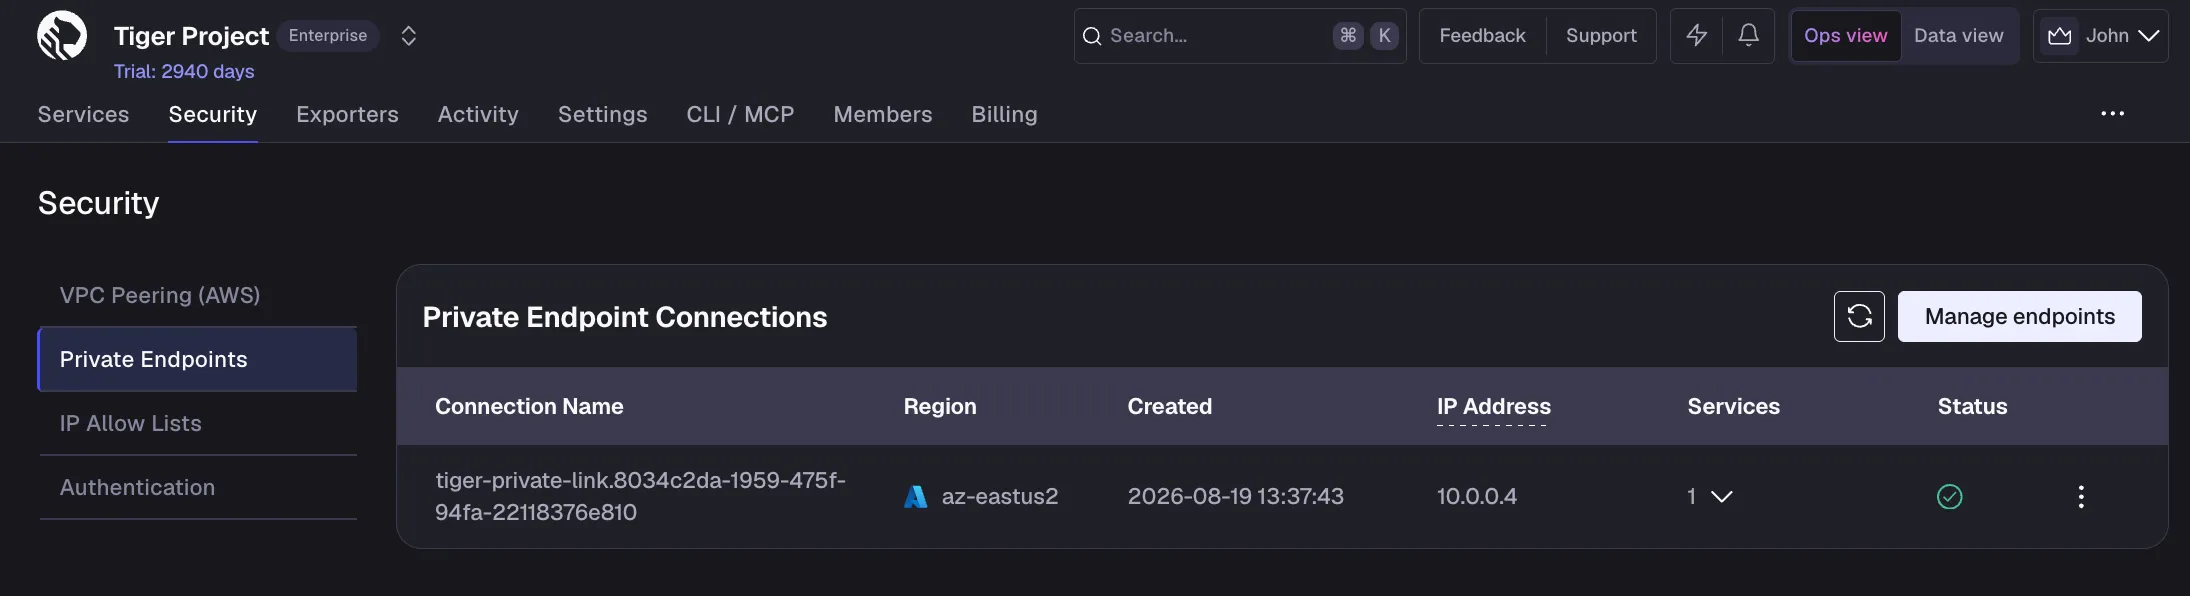
Claim it, paste the ID you copied intoEndpoint identifier, then clickClaim connection. Tiger Cloud links the connection to the project you are working in, and it appears in the list.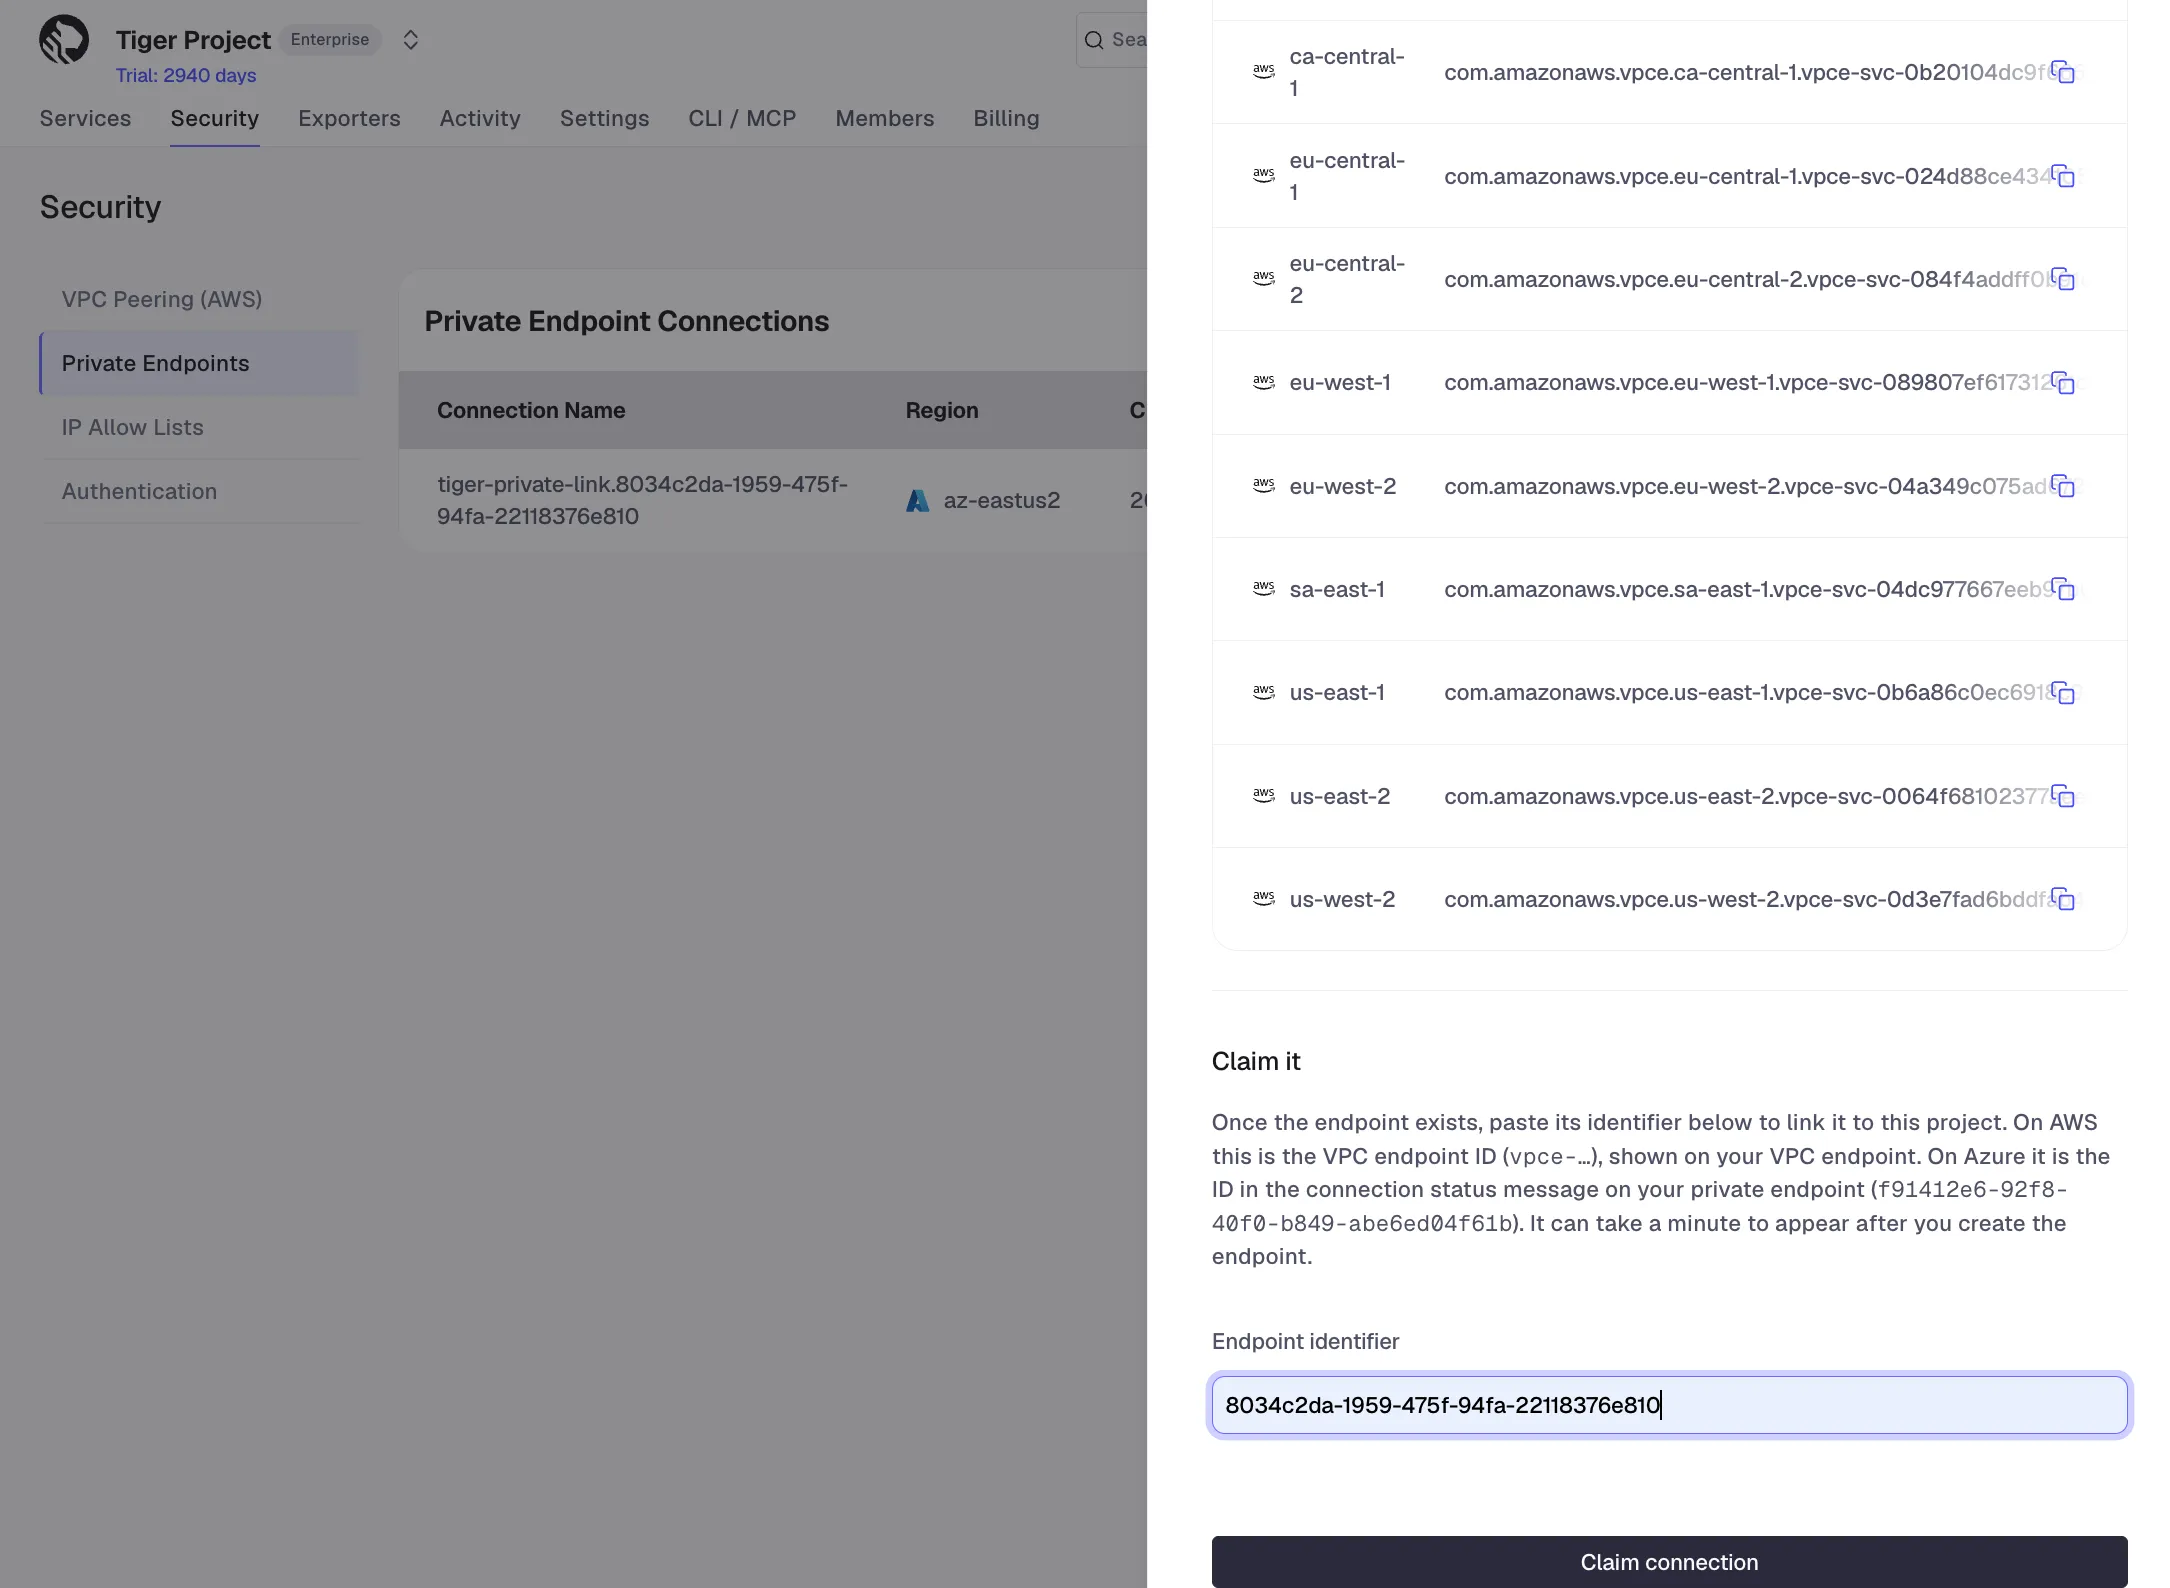 Note
NoteYou can claim a private endpoint against one project only.
-
- Configure and attach
-
Under
IP AddressclickAdd IPand paste the private endpoint IP address you have copied from Azure Portal. -
Under
ServicesclickAttach service. Select your service from the dropdown and clickAttach. You can attach a service to one private endpoint.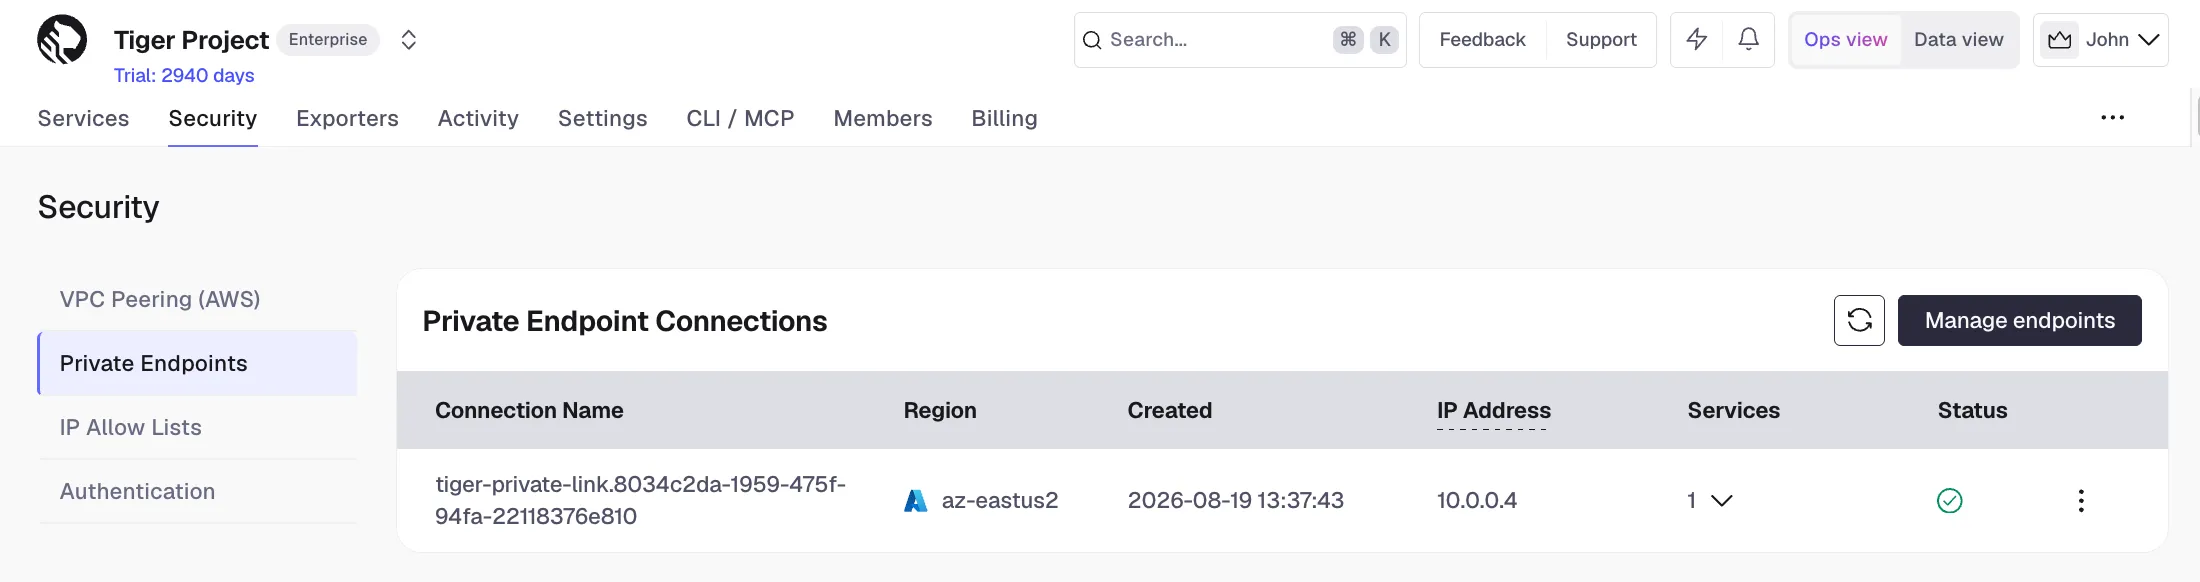
-
From a VM inside your Azure VNet, connect to your service using a connection string with your connection details. You should be able to connect successfully.
-
Manage connections
- To detach a service from a private endpoint connection, go to
Security>Private Endpoints, expand the arrow in theServicescolumn, and click the trash icon next to the service connection string. - To edit or remove an endpoint connection, go to
Security>Private Endpointsand click the three dots next to the connection in the list. SelectEditorDisconnect, respectively. You need to detach all services from a private endpoint connection before deleting it.