

Private endpoints
Connect your services to AWS PrivateLink endpoints to eliminate public internet exposure
With Tiger Cloud, you can connect your services to AWS PrivateLink endpoints. A private endpoint in your VPC routes traffic to your service over the AWS backbone, without crossing the public internet or requiring VPC peering. This page describes how to create a private endpoint on the AWS side, claim it in Tiger Console, and attach a service to it.
Prerequisites for this procedure
To follow these steps, you'll need:
- An AWS account with a VPC and a subnet for the resources you will connect to Tiger Cloud.
- IAM permissions configured to create VPC endpoints.
Set up a private endpoint connection
Section titled “Set up a private endpoint connection”Take the following steps to connect your Tiger Cloud service to a PrivateLink endpoint.
- Copy the alias for your region
-
In Tiger Console, select
Security>Private Endpoints>Manage endpoints. -
Under
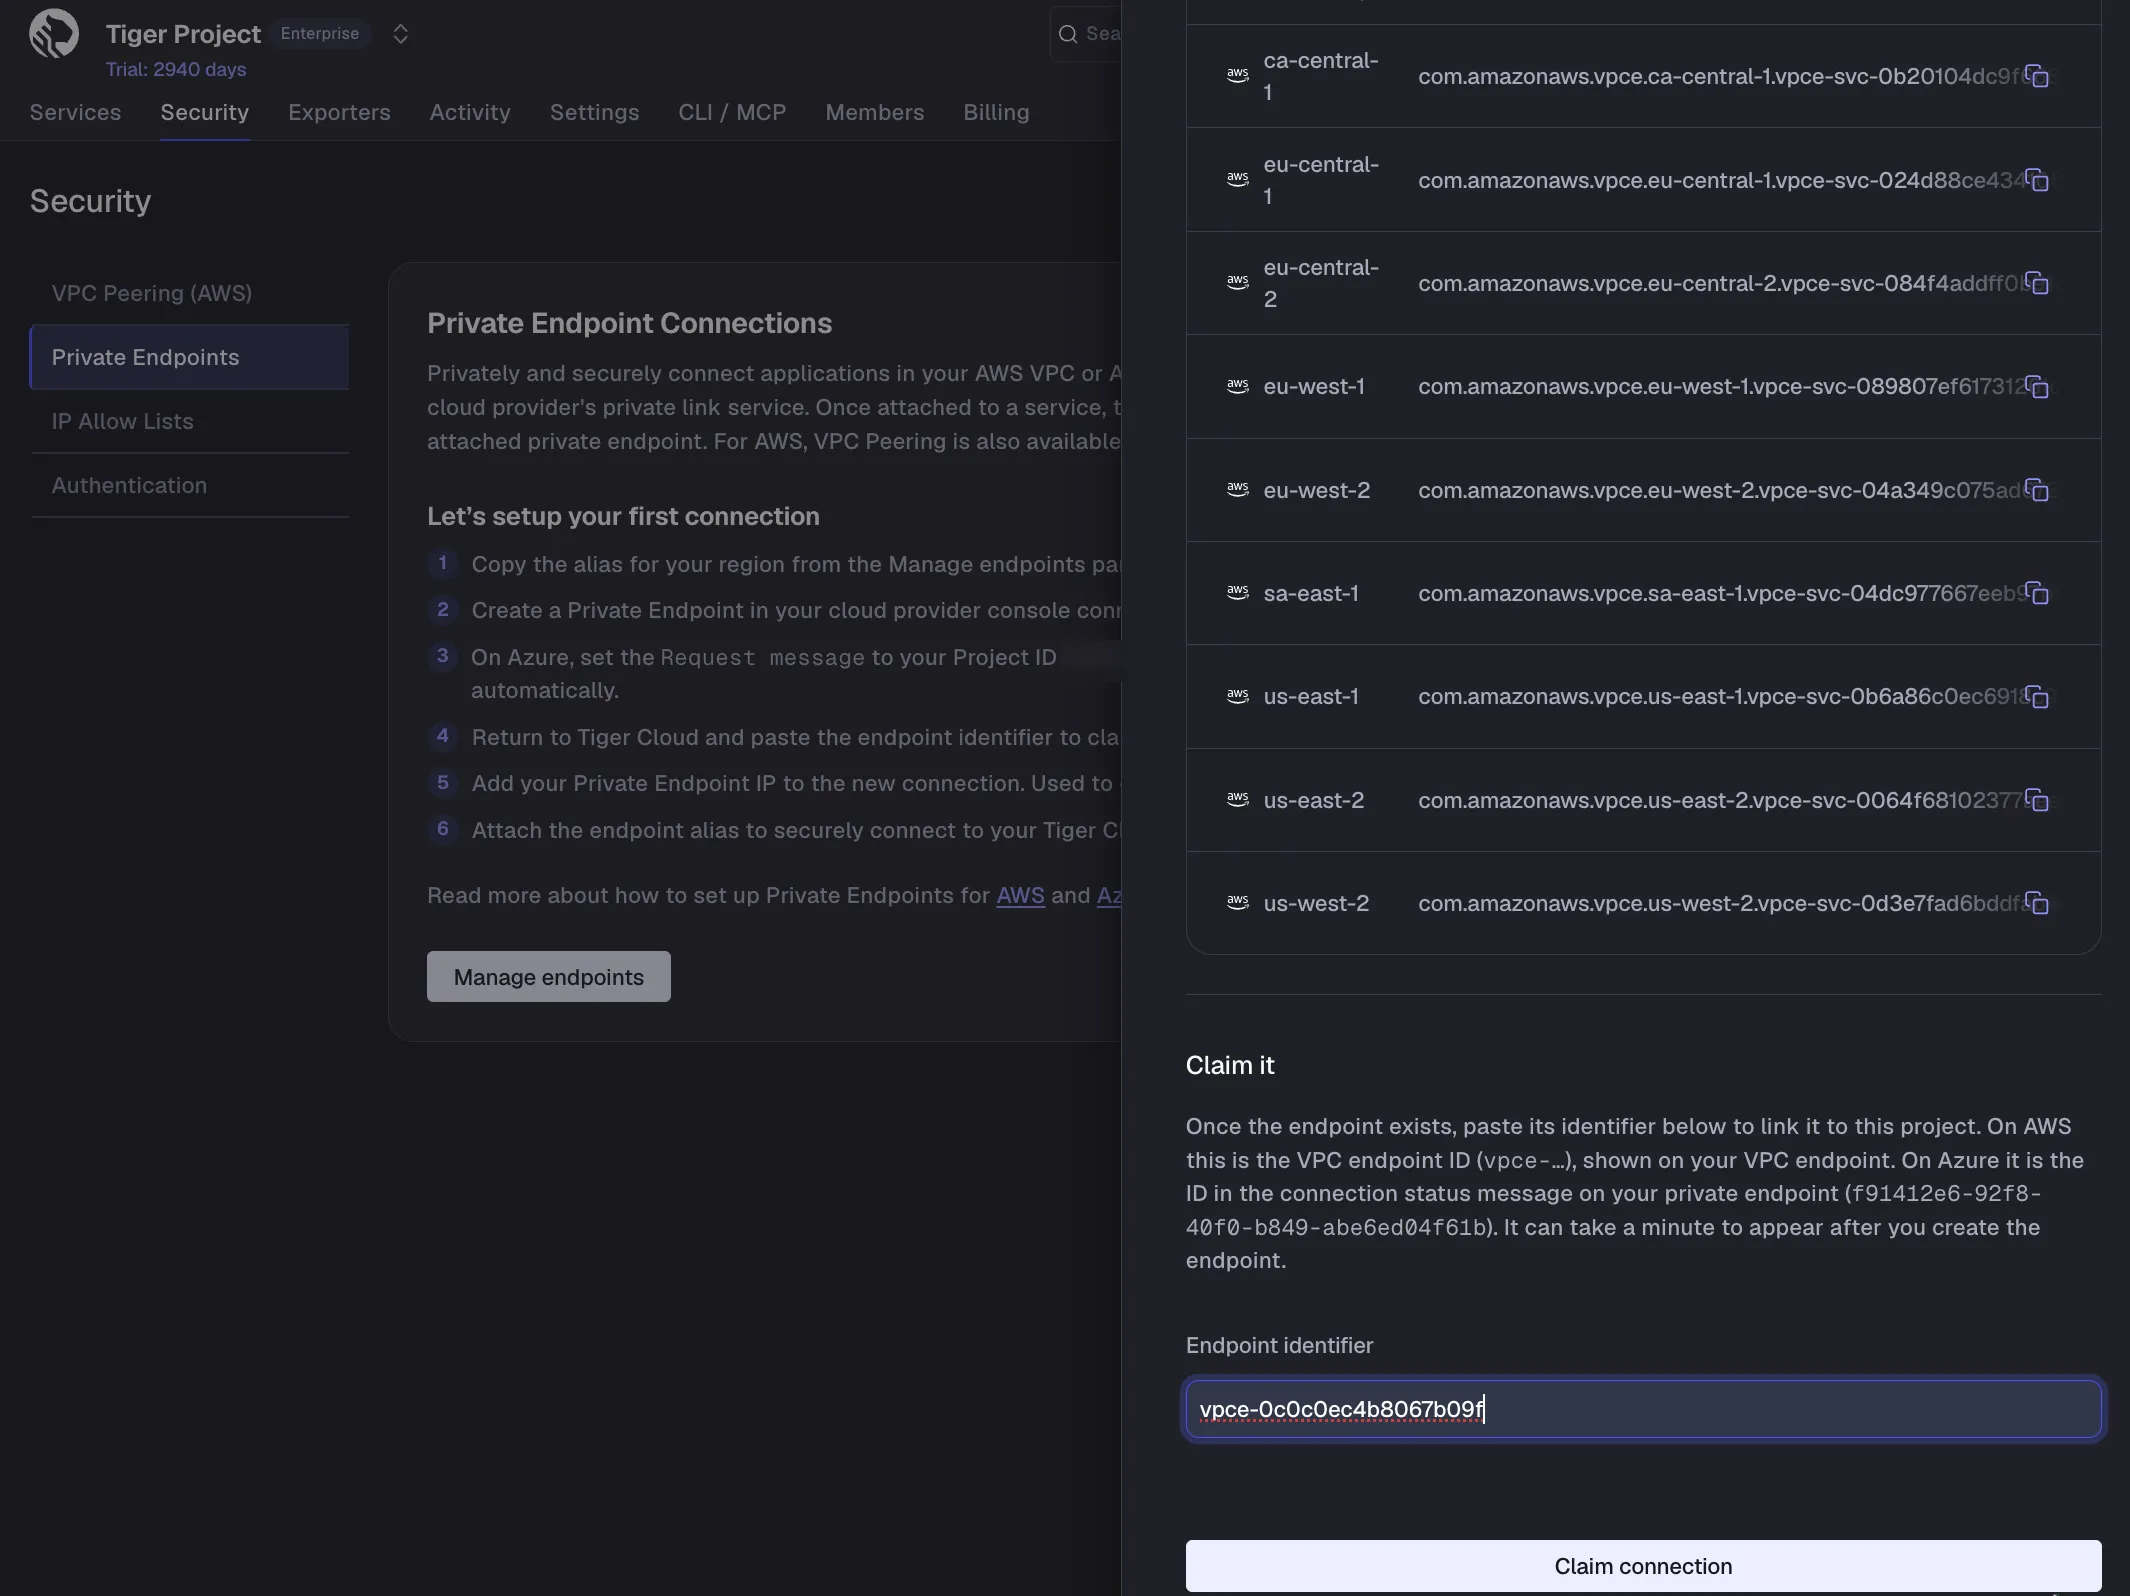
Create the endpoint, copy theAliasfor the region in which you need to create the connection. Choose the region of your AWS resources.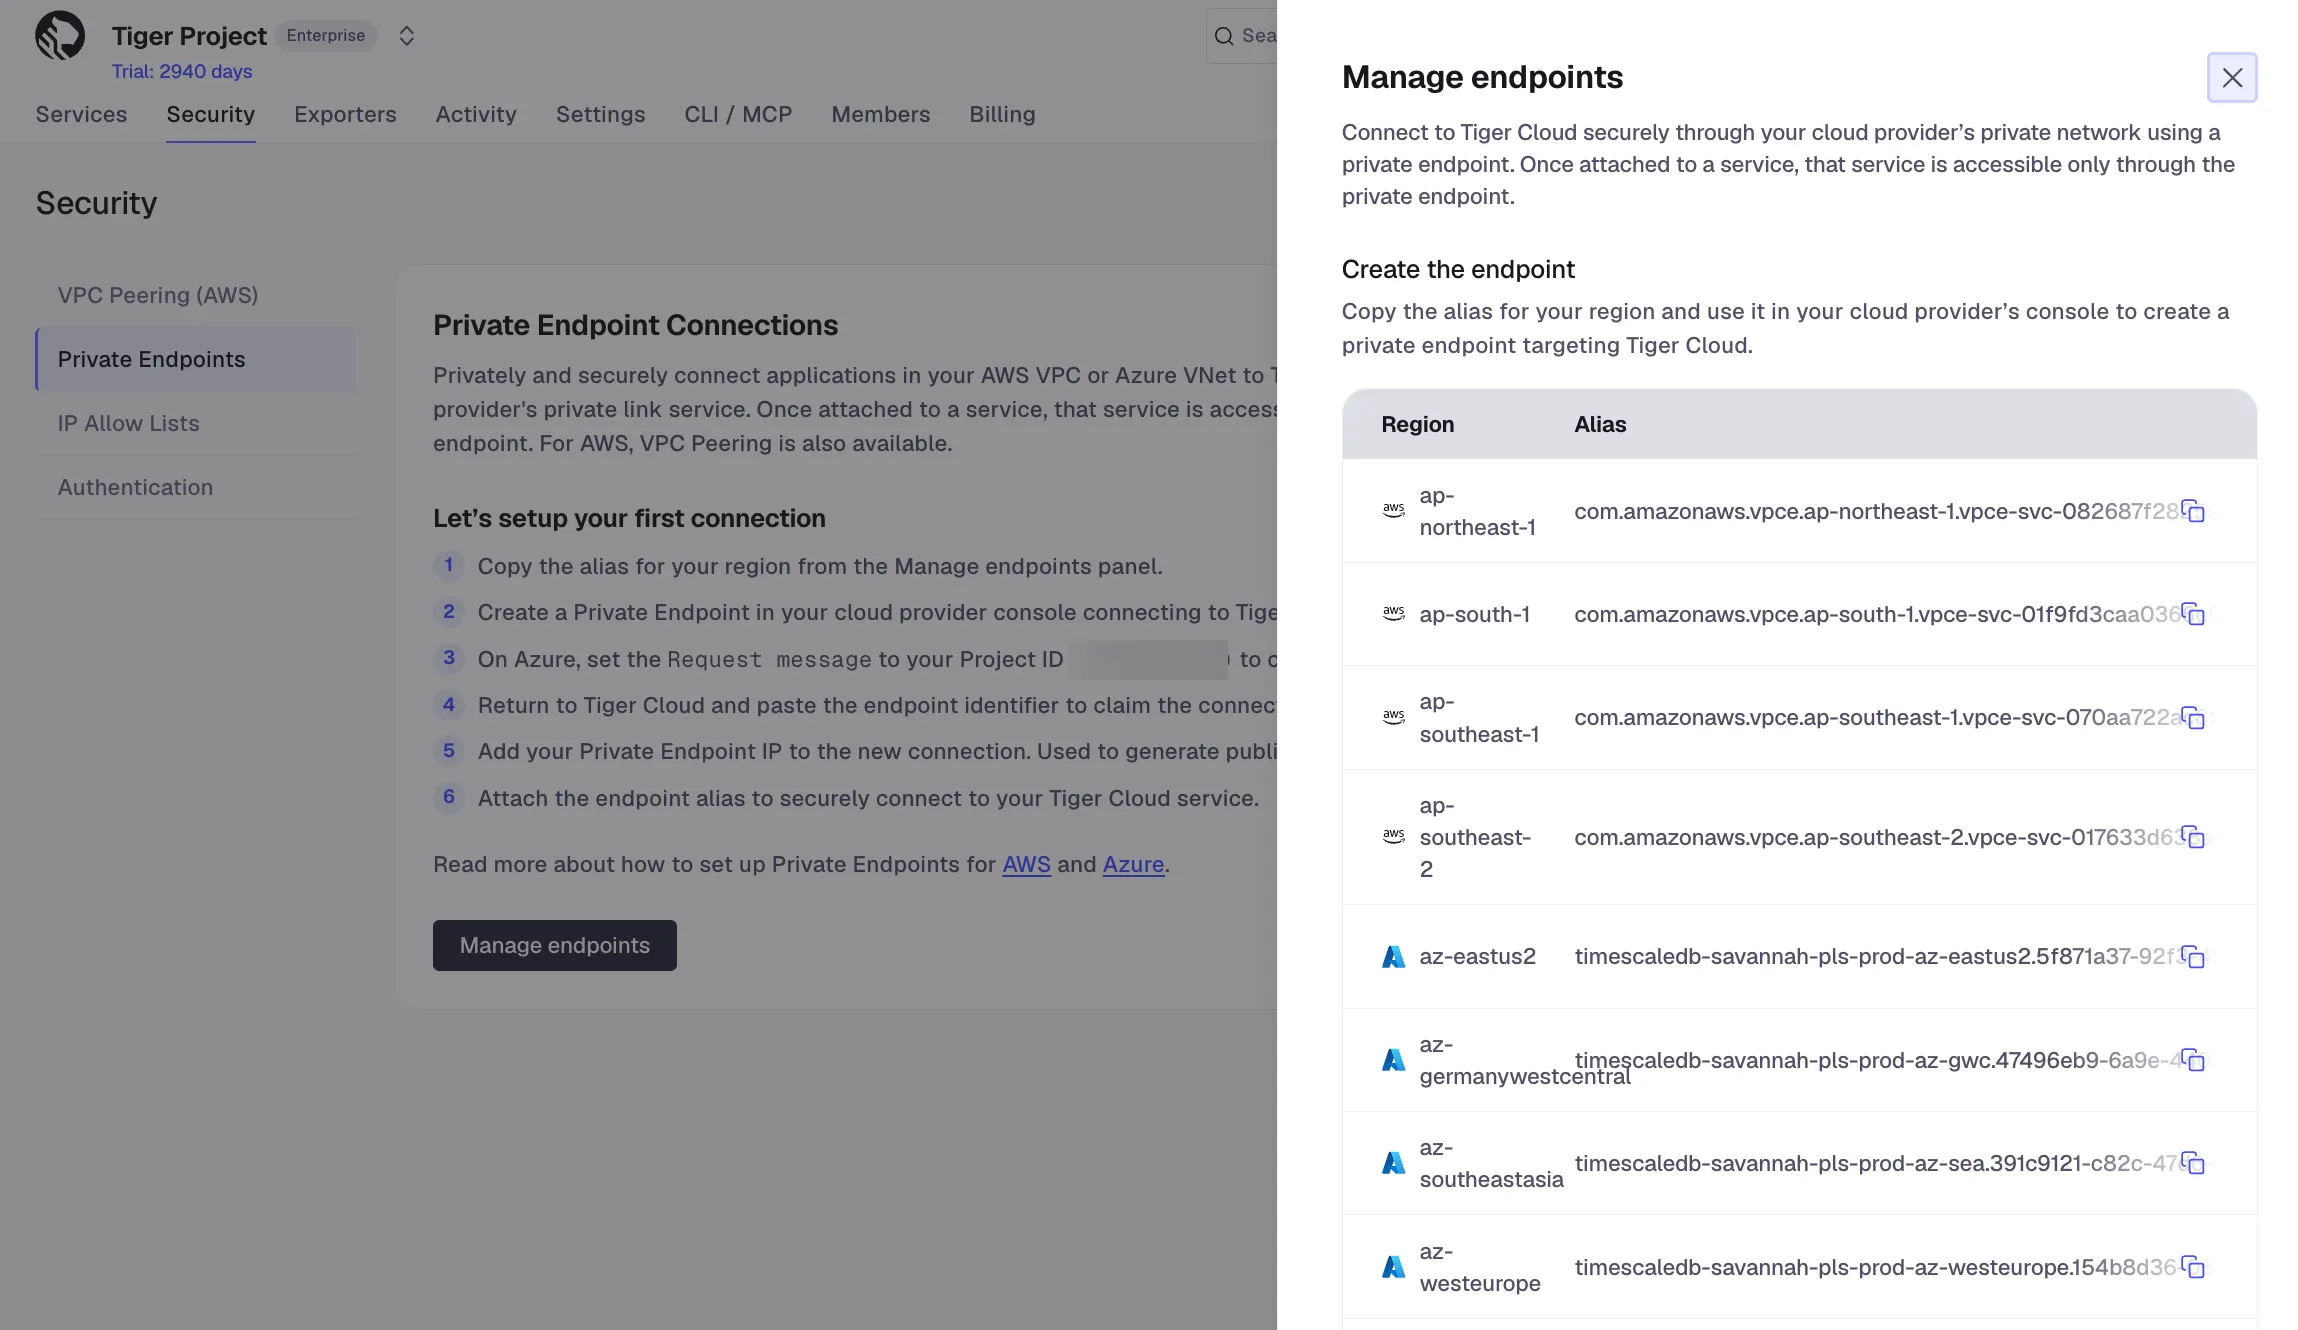
-
- Create a VPC endpoint in AWS
-
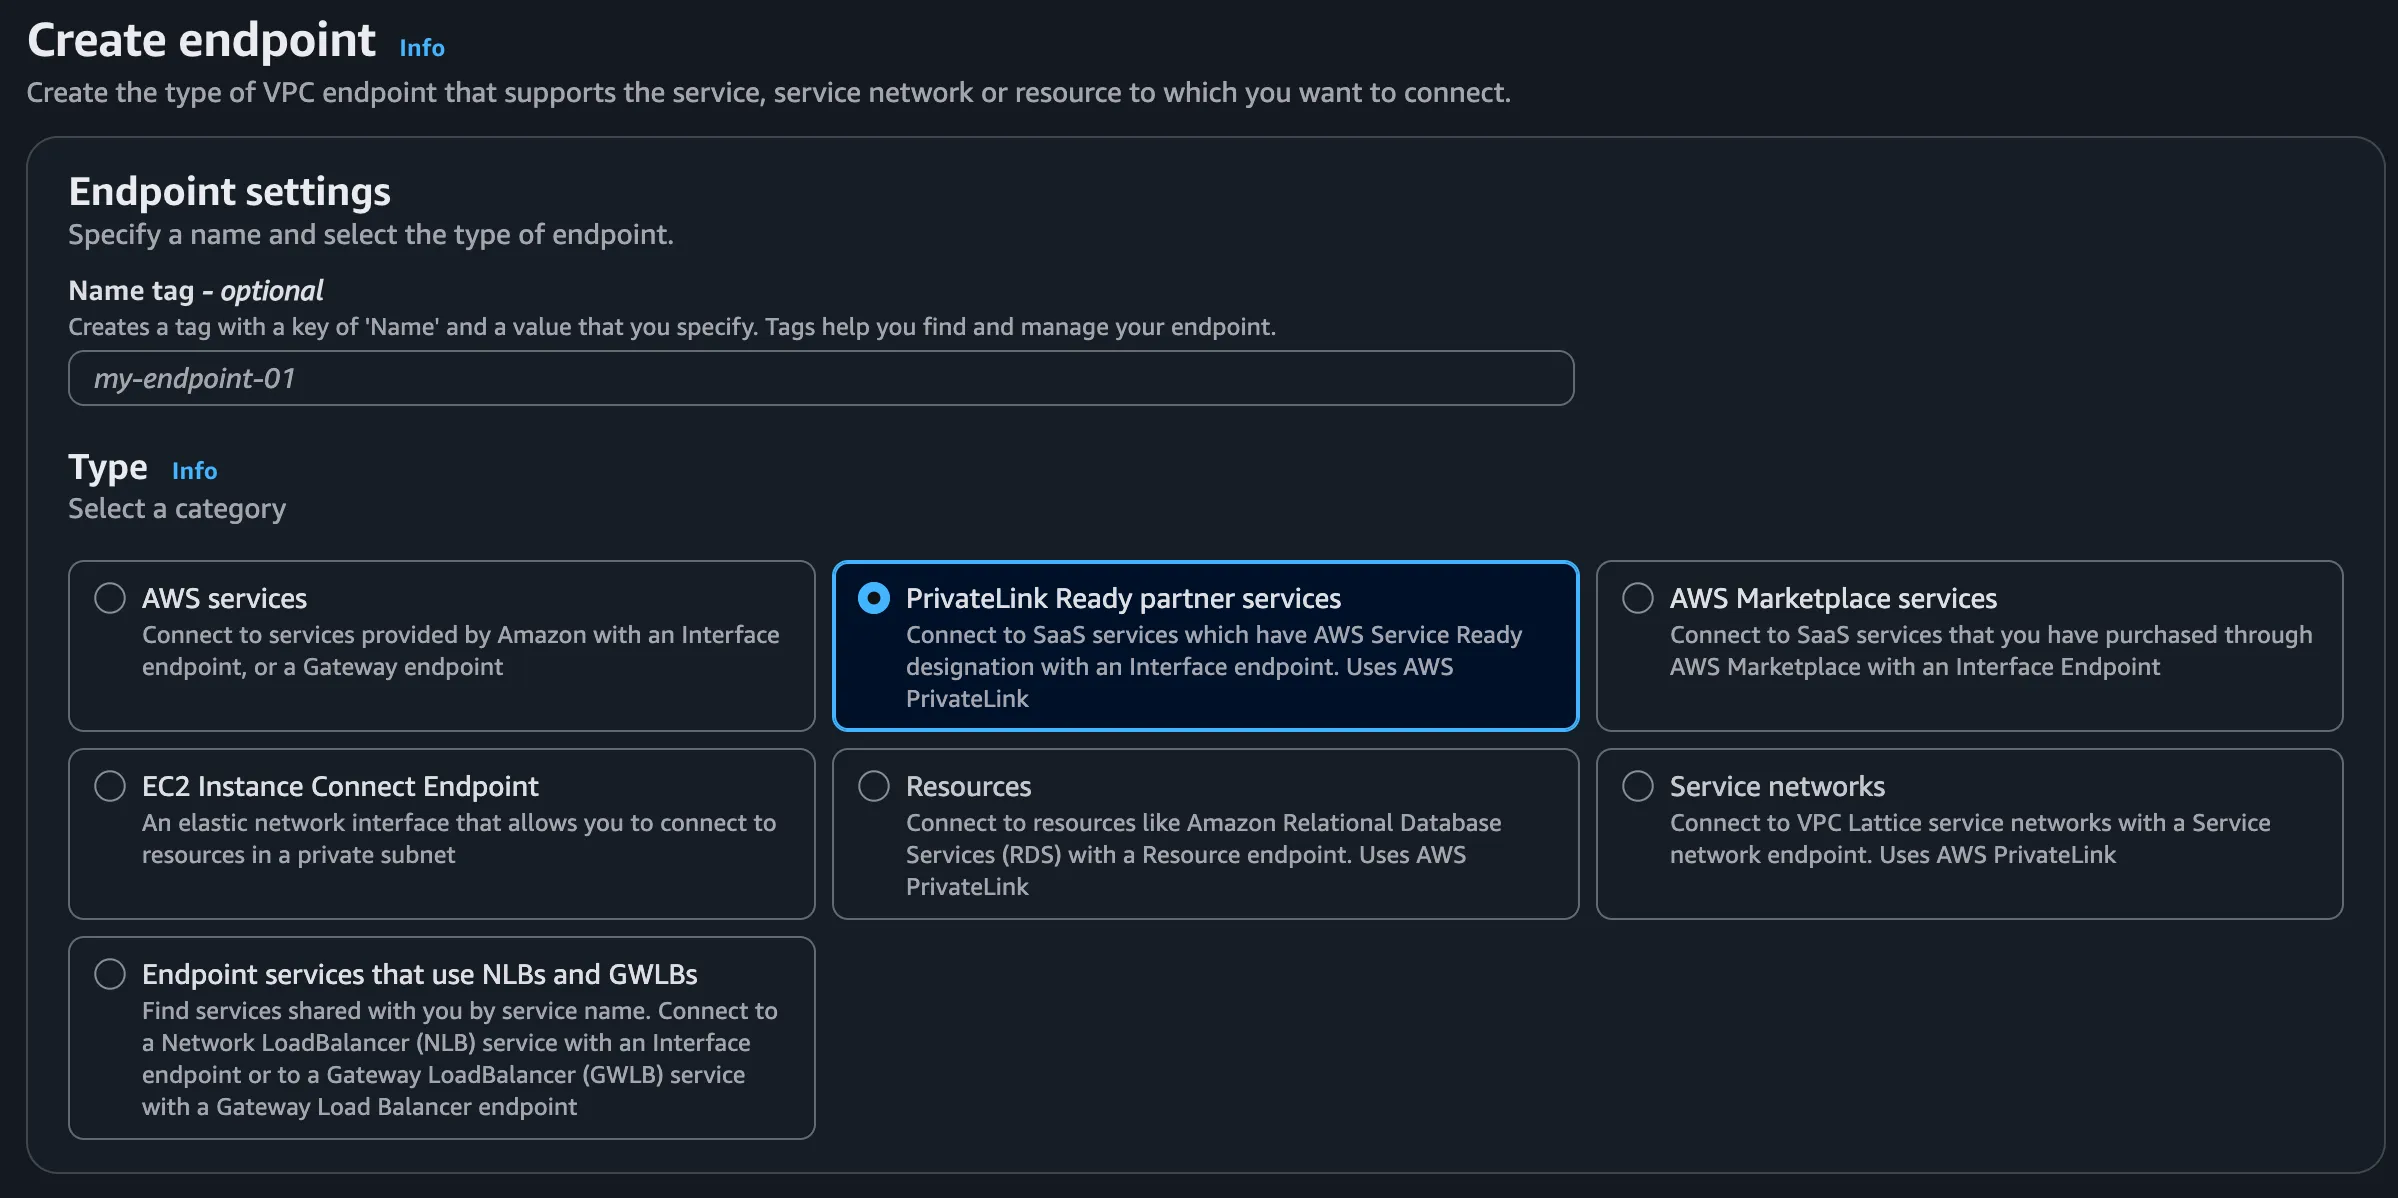
In AWS Console, go to
VPC>Endpoints>Create endpoint. -
Optionally provide a name tag for your endpoint.
-
Under
Type, selectPrivateLink Ready partner services.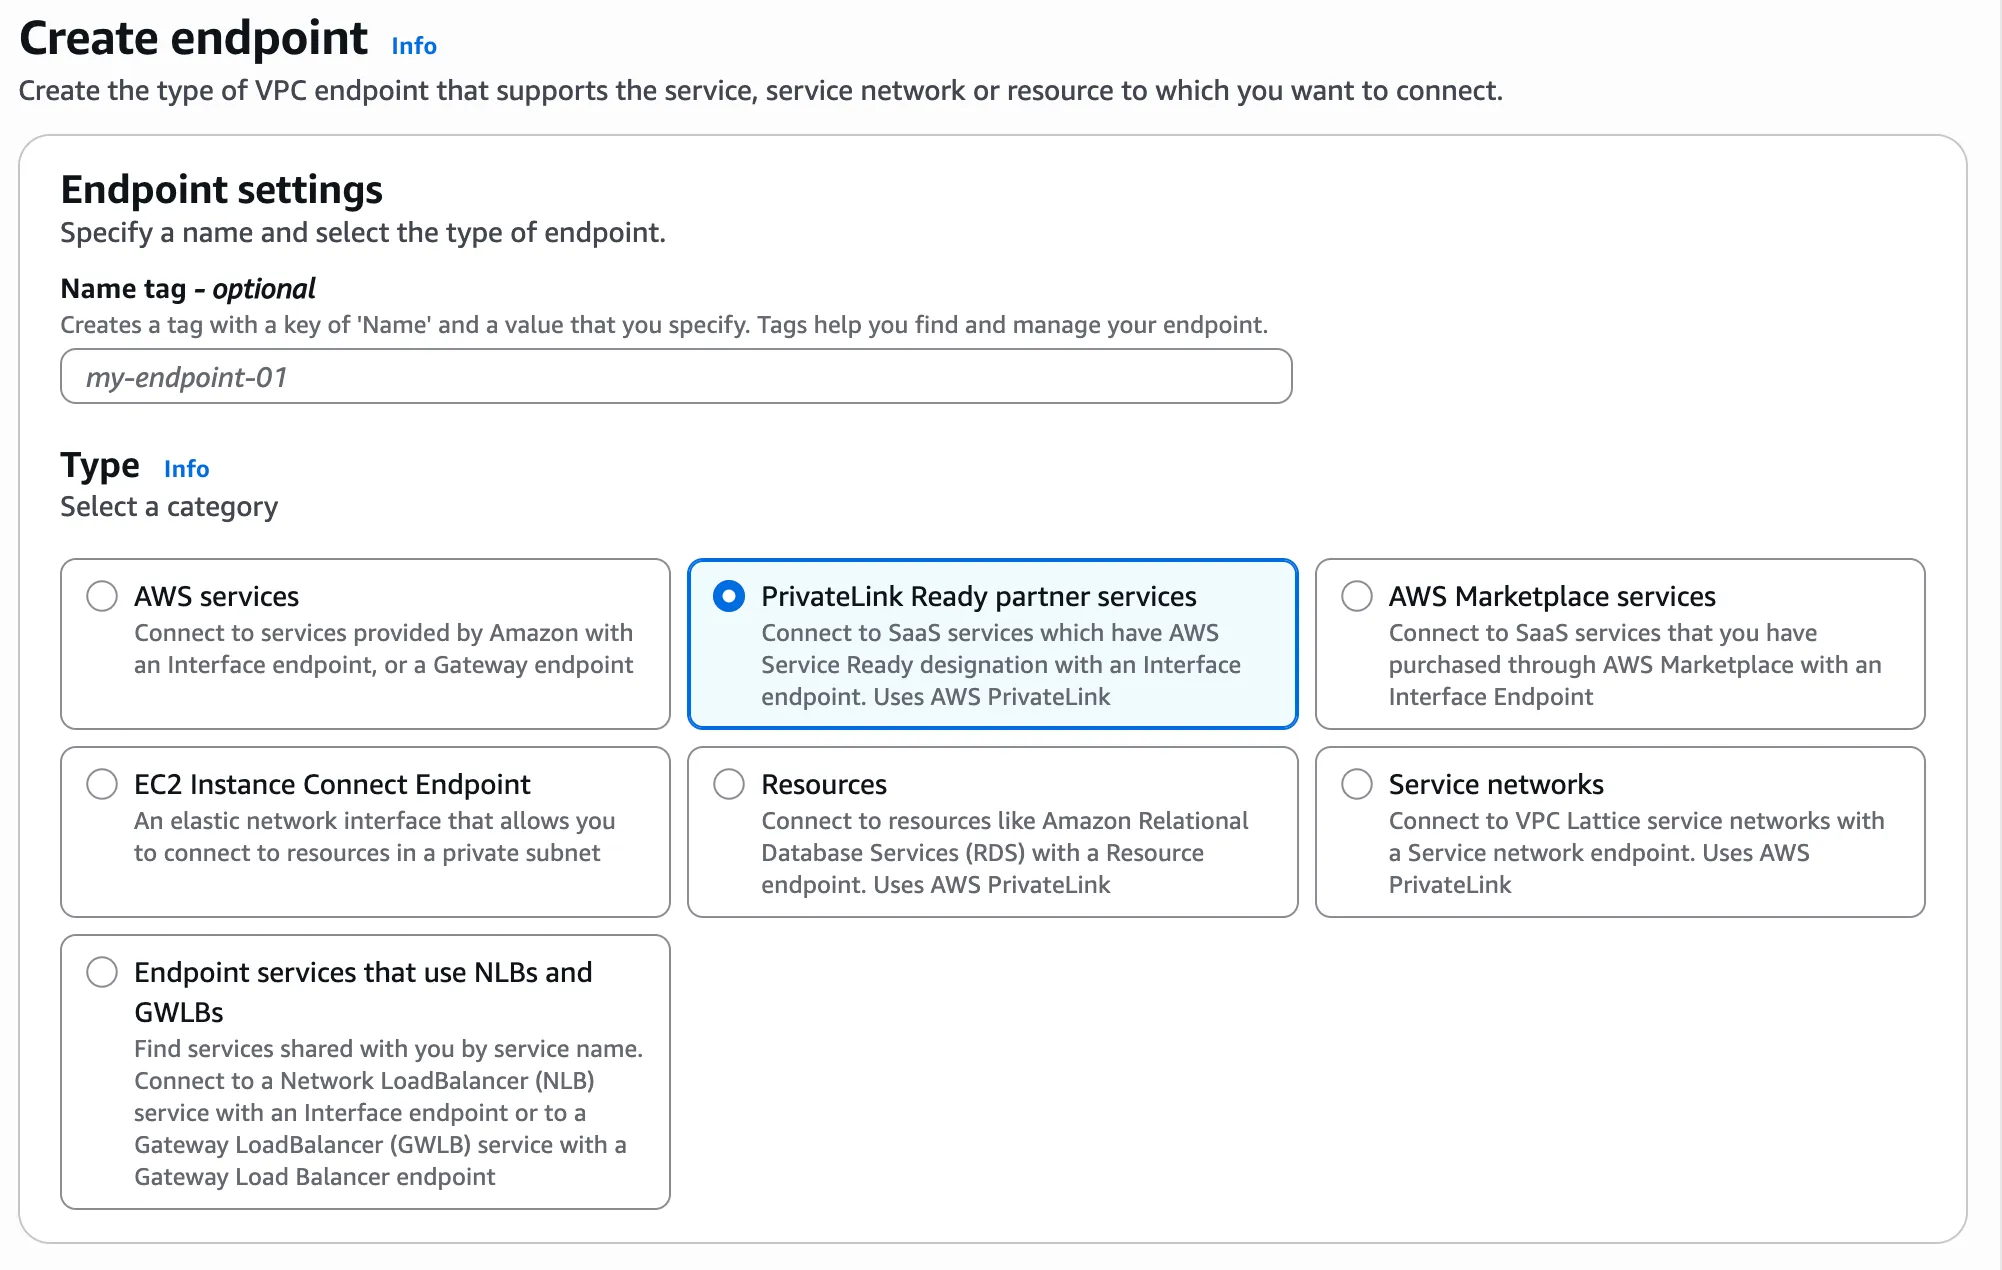
-
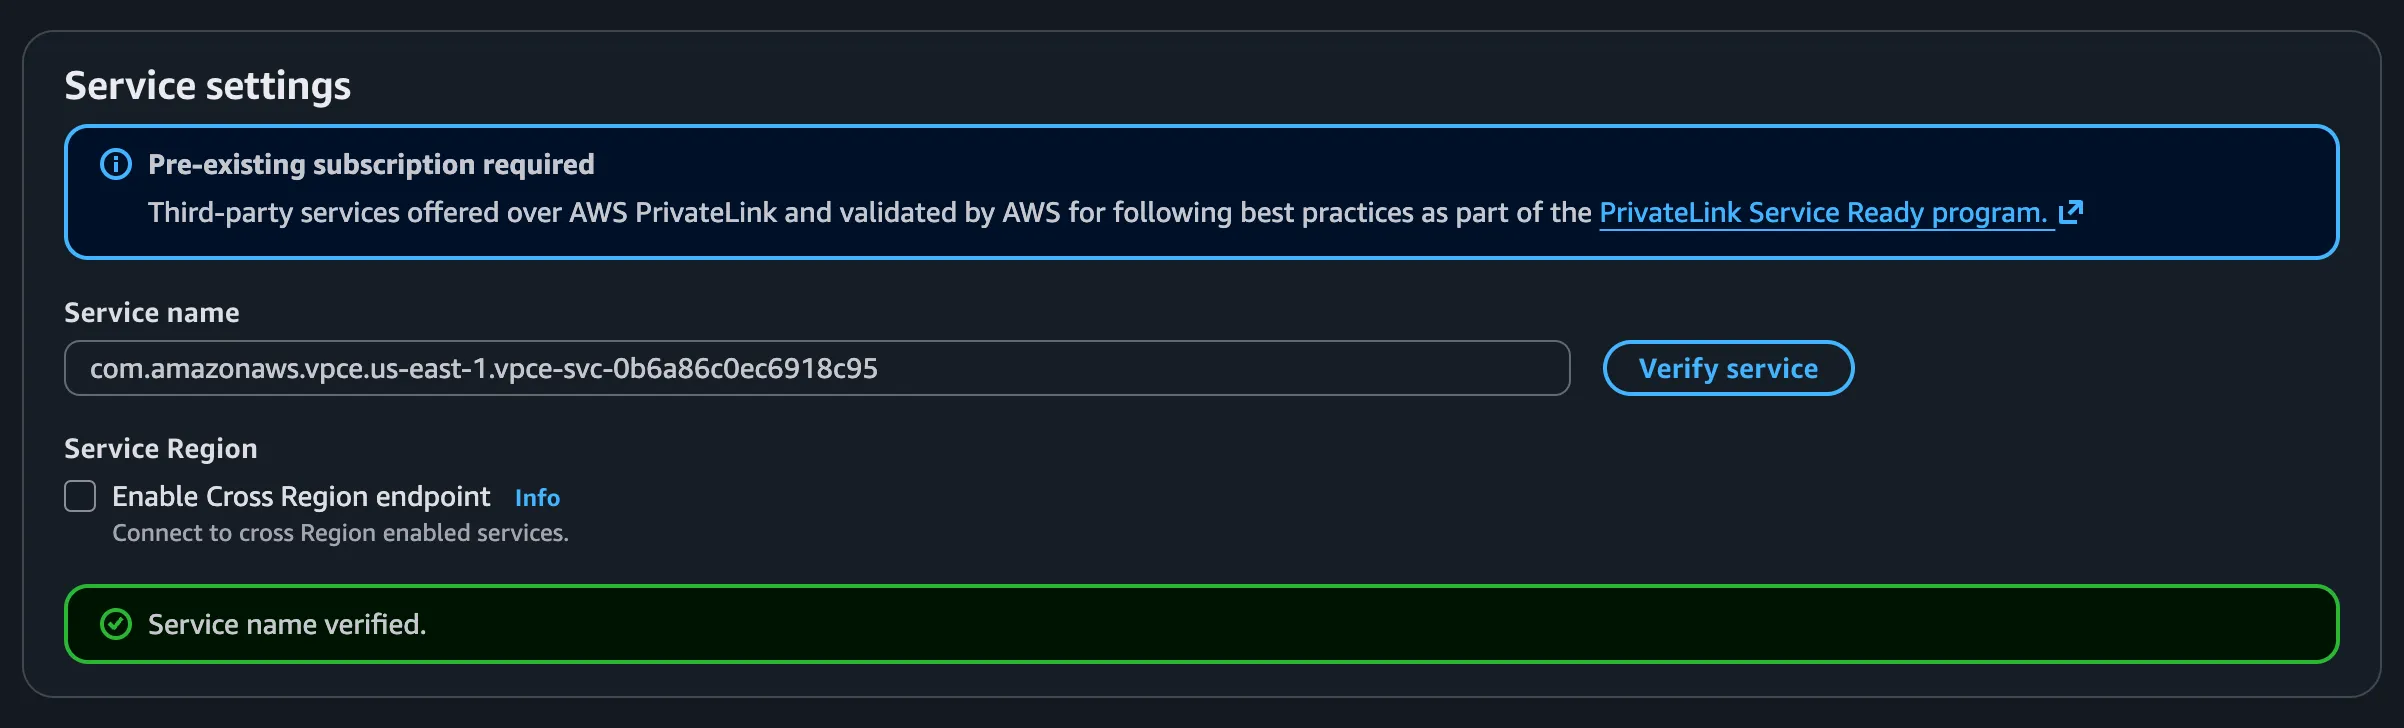
Under
Service settings>Service name, paste in the alias your copied in Tiger Console and clickVerify service. Wait for theService name verified.success message.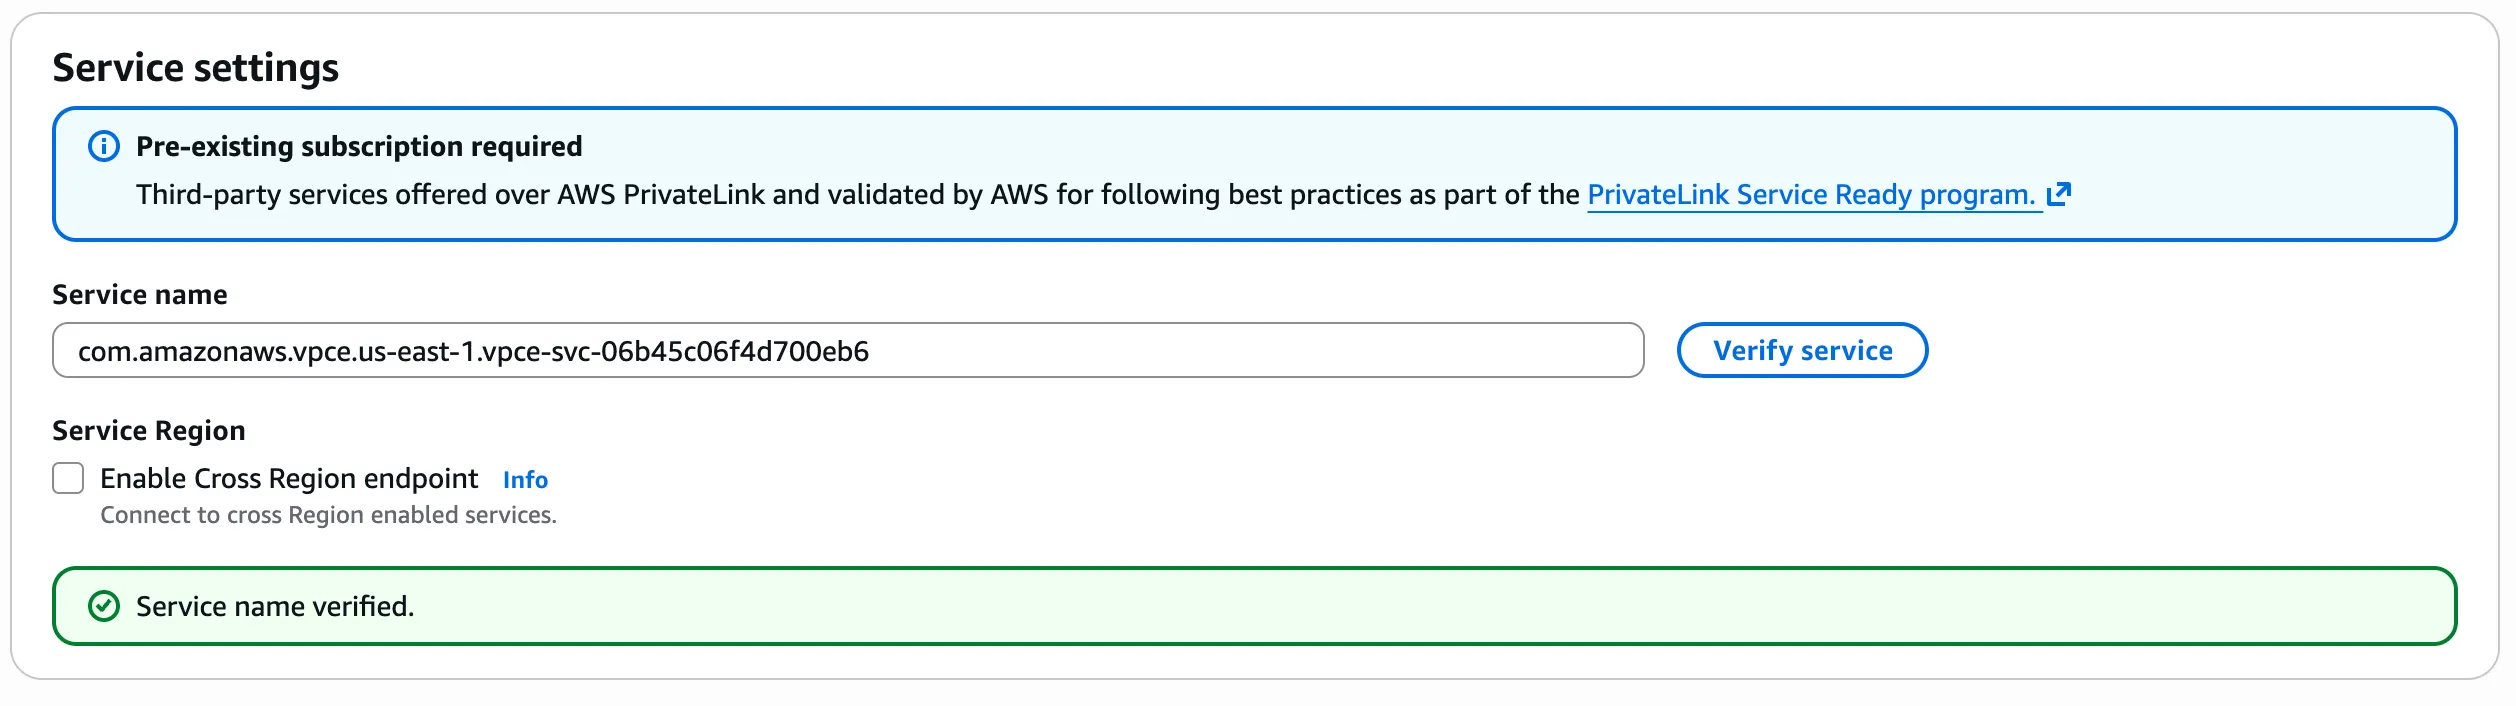
-
Select the VPC that contains the resources you want to connect to Tiger Cloud, then choose one or more Availability Zones and subnets where the endpoint's private IPs will be created. For lowest latency and no cross-AZ data transfer charges, match the Availability Zones of your workloads; select multiple AZs for high availability.
-
Optionally configure the security groups and tags, then click
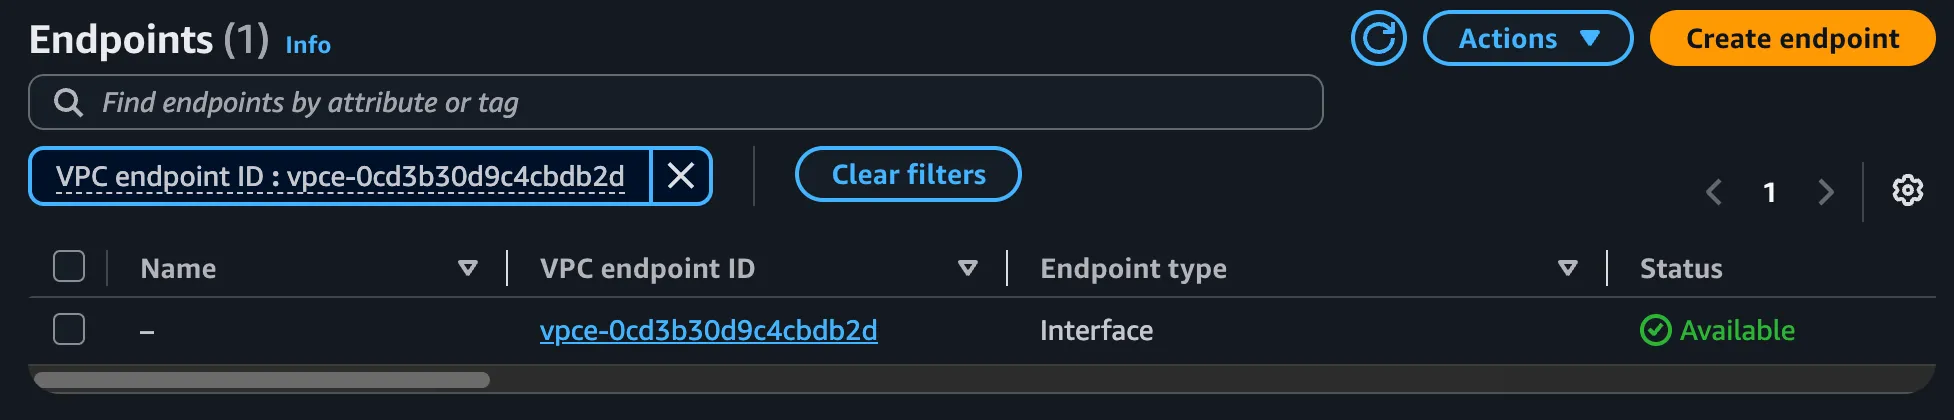
Create endpoint. -
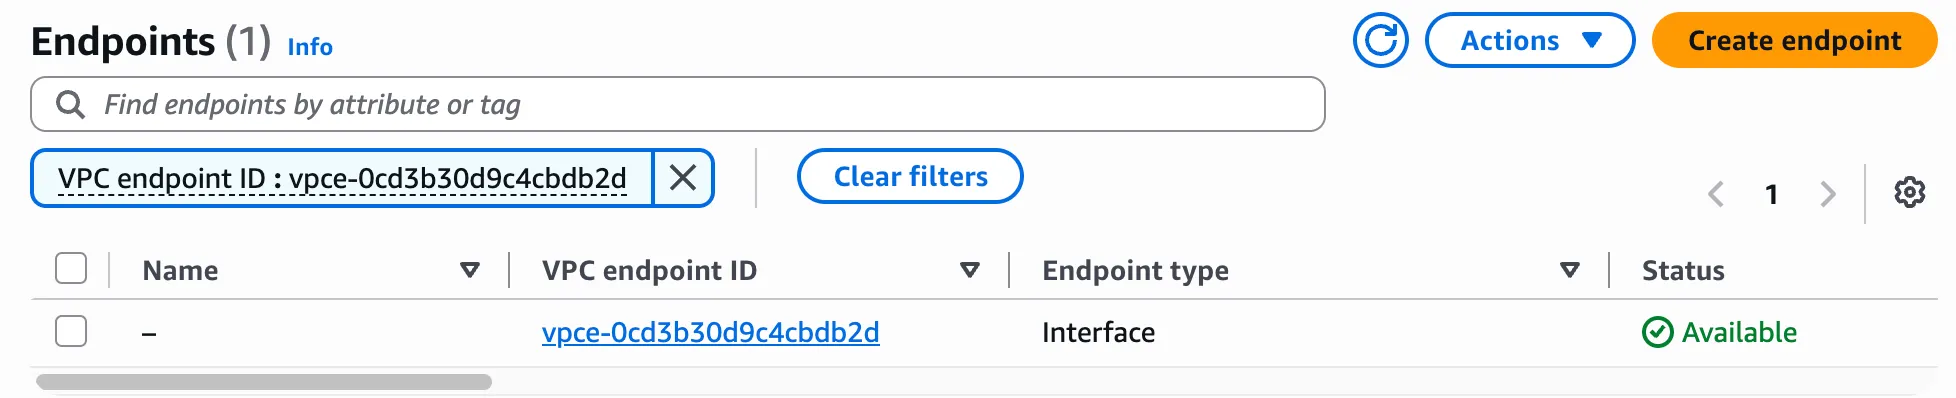
Copy the VPC endpoint ID of your new endpoint. You claim the connection with this ID:
-
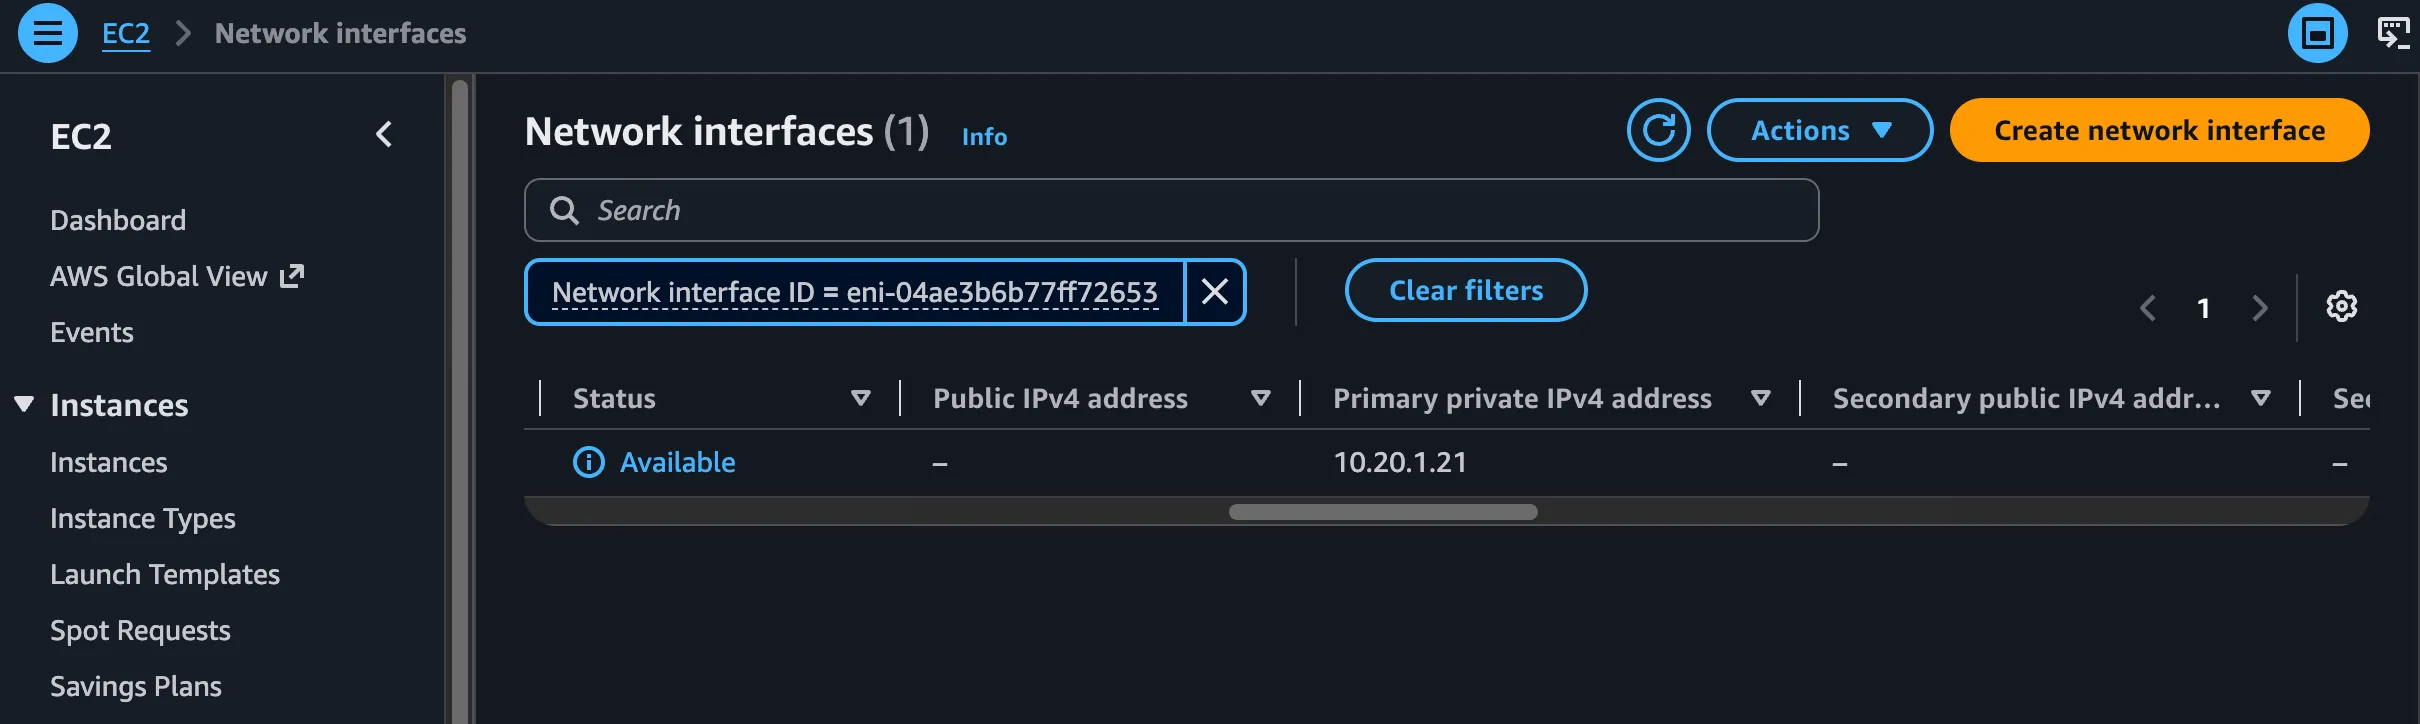
Go to
EC2>Network interfacesand copy the primary private IPv4 address of your endpoint: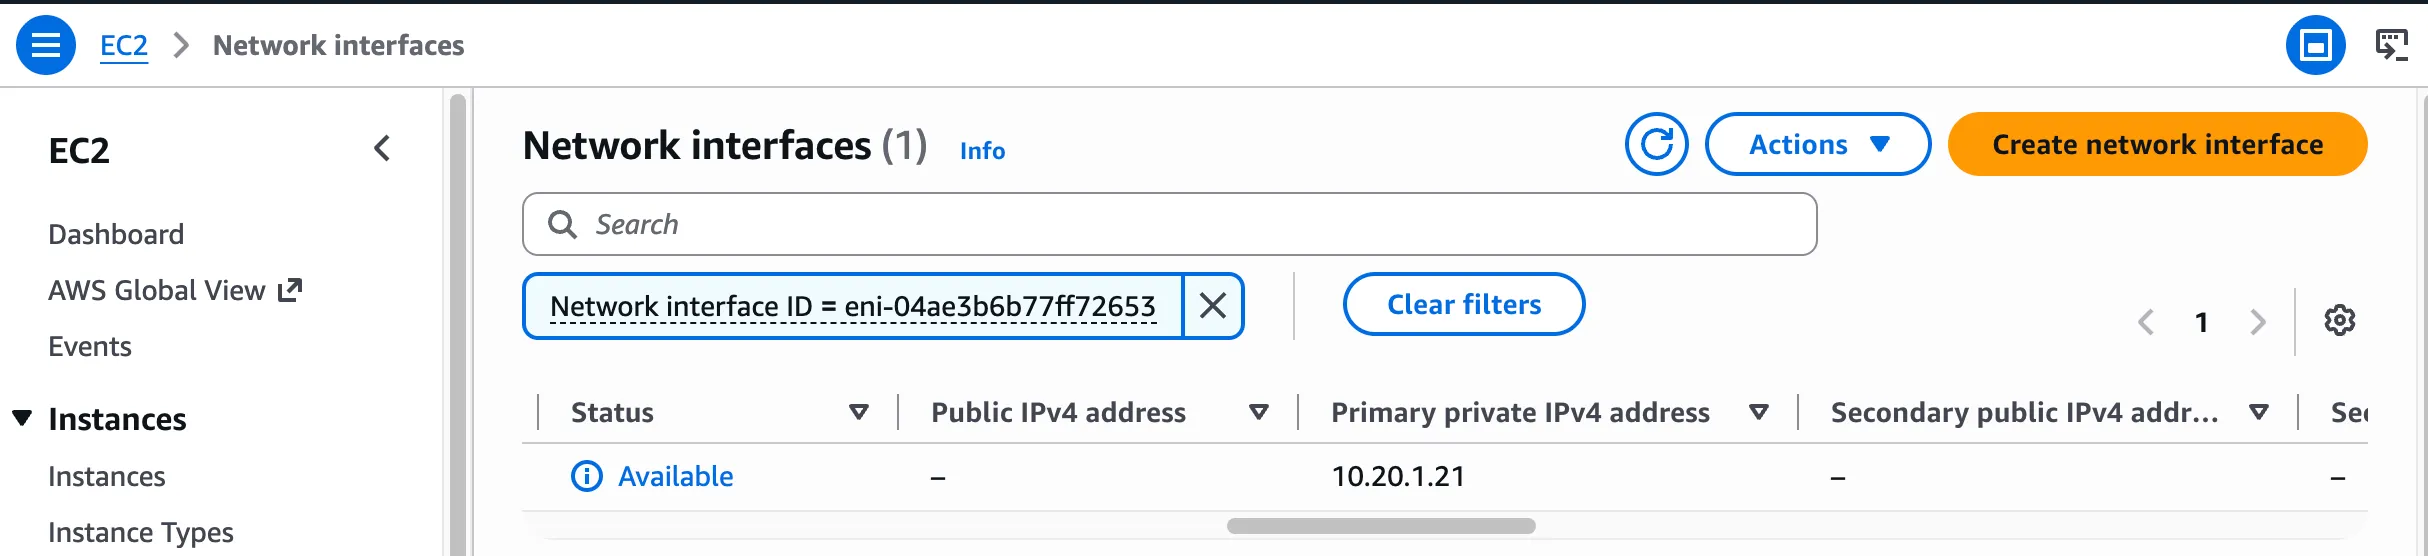
-
- Claim the connection
-
In Tiger Console >
Security>Private Endpoints, clickManage endpoints. -
Under
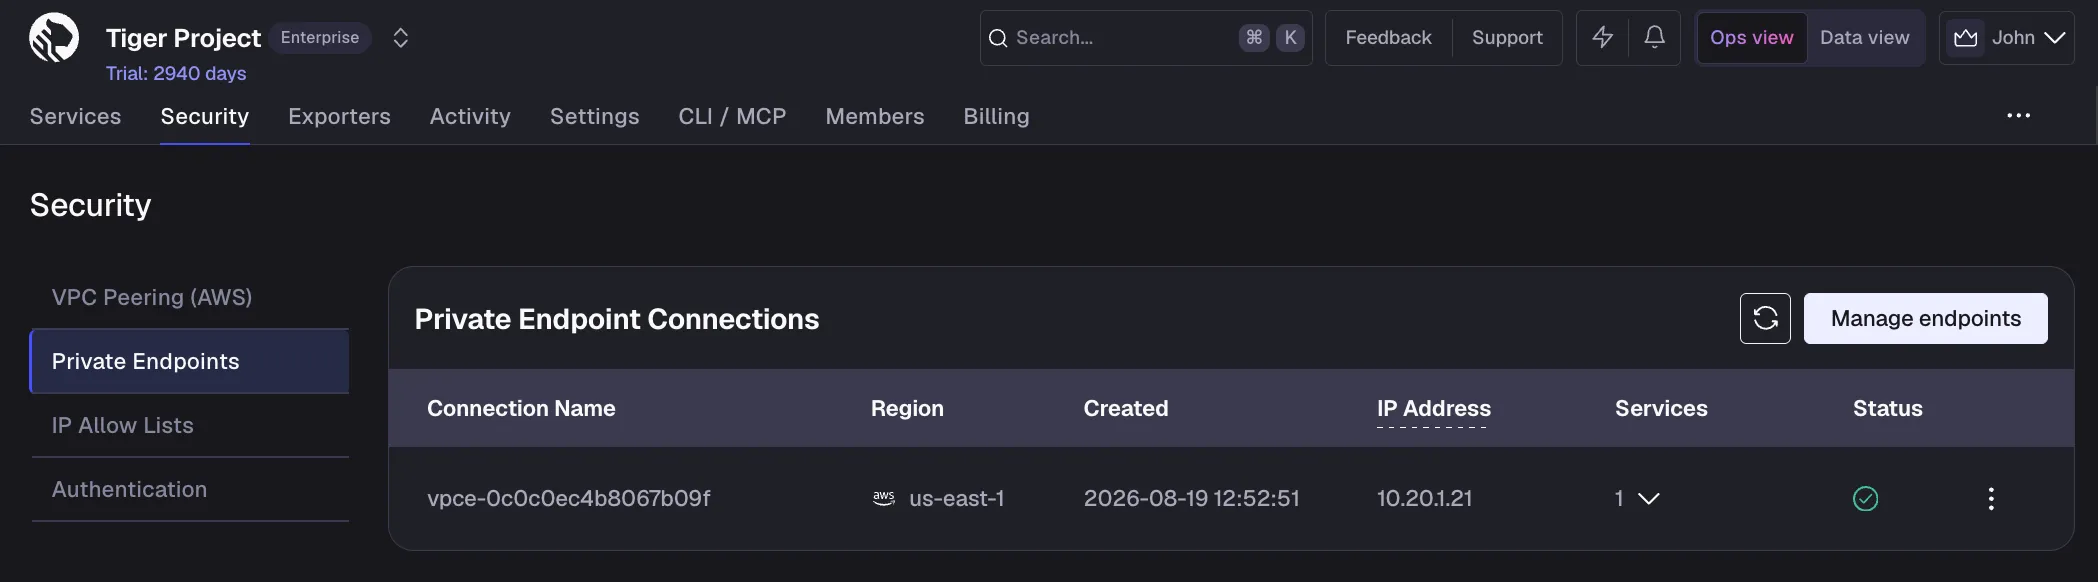
Claim it, paste your VPC endpoint ID intoEndpoint identifier, then clickClaim connection. Tiger Cloud links the connection to the project you are working in, and it appears in the list.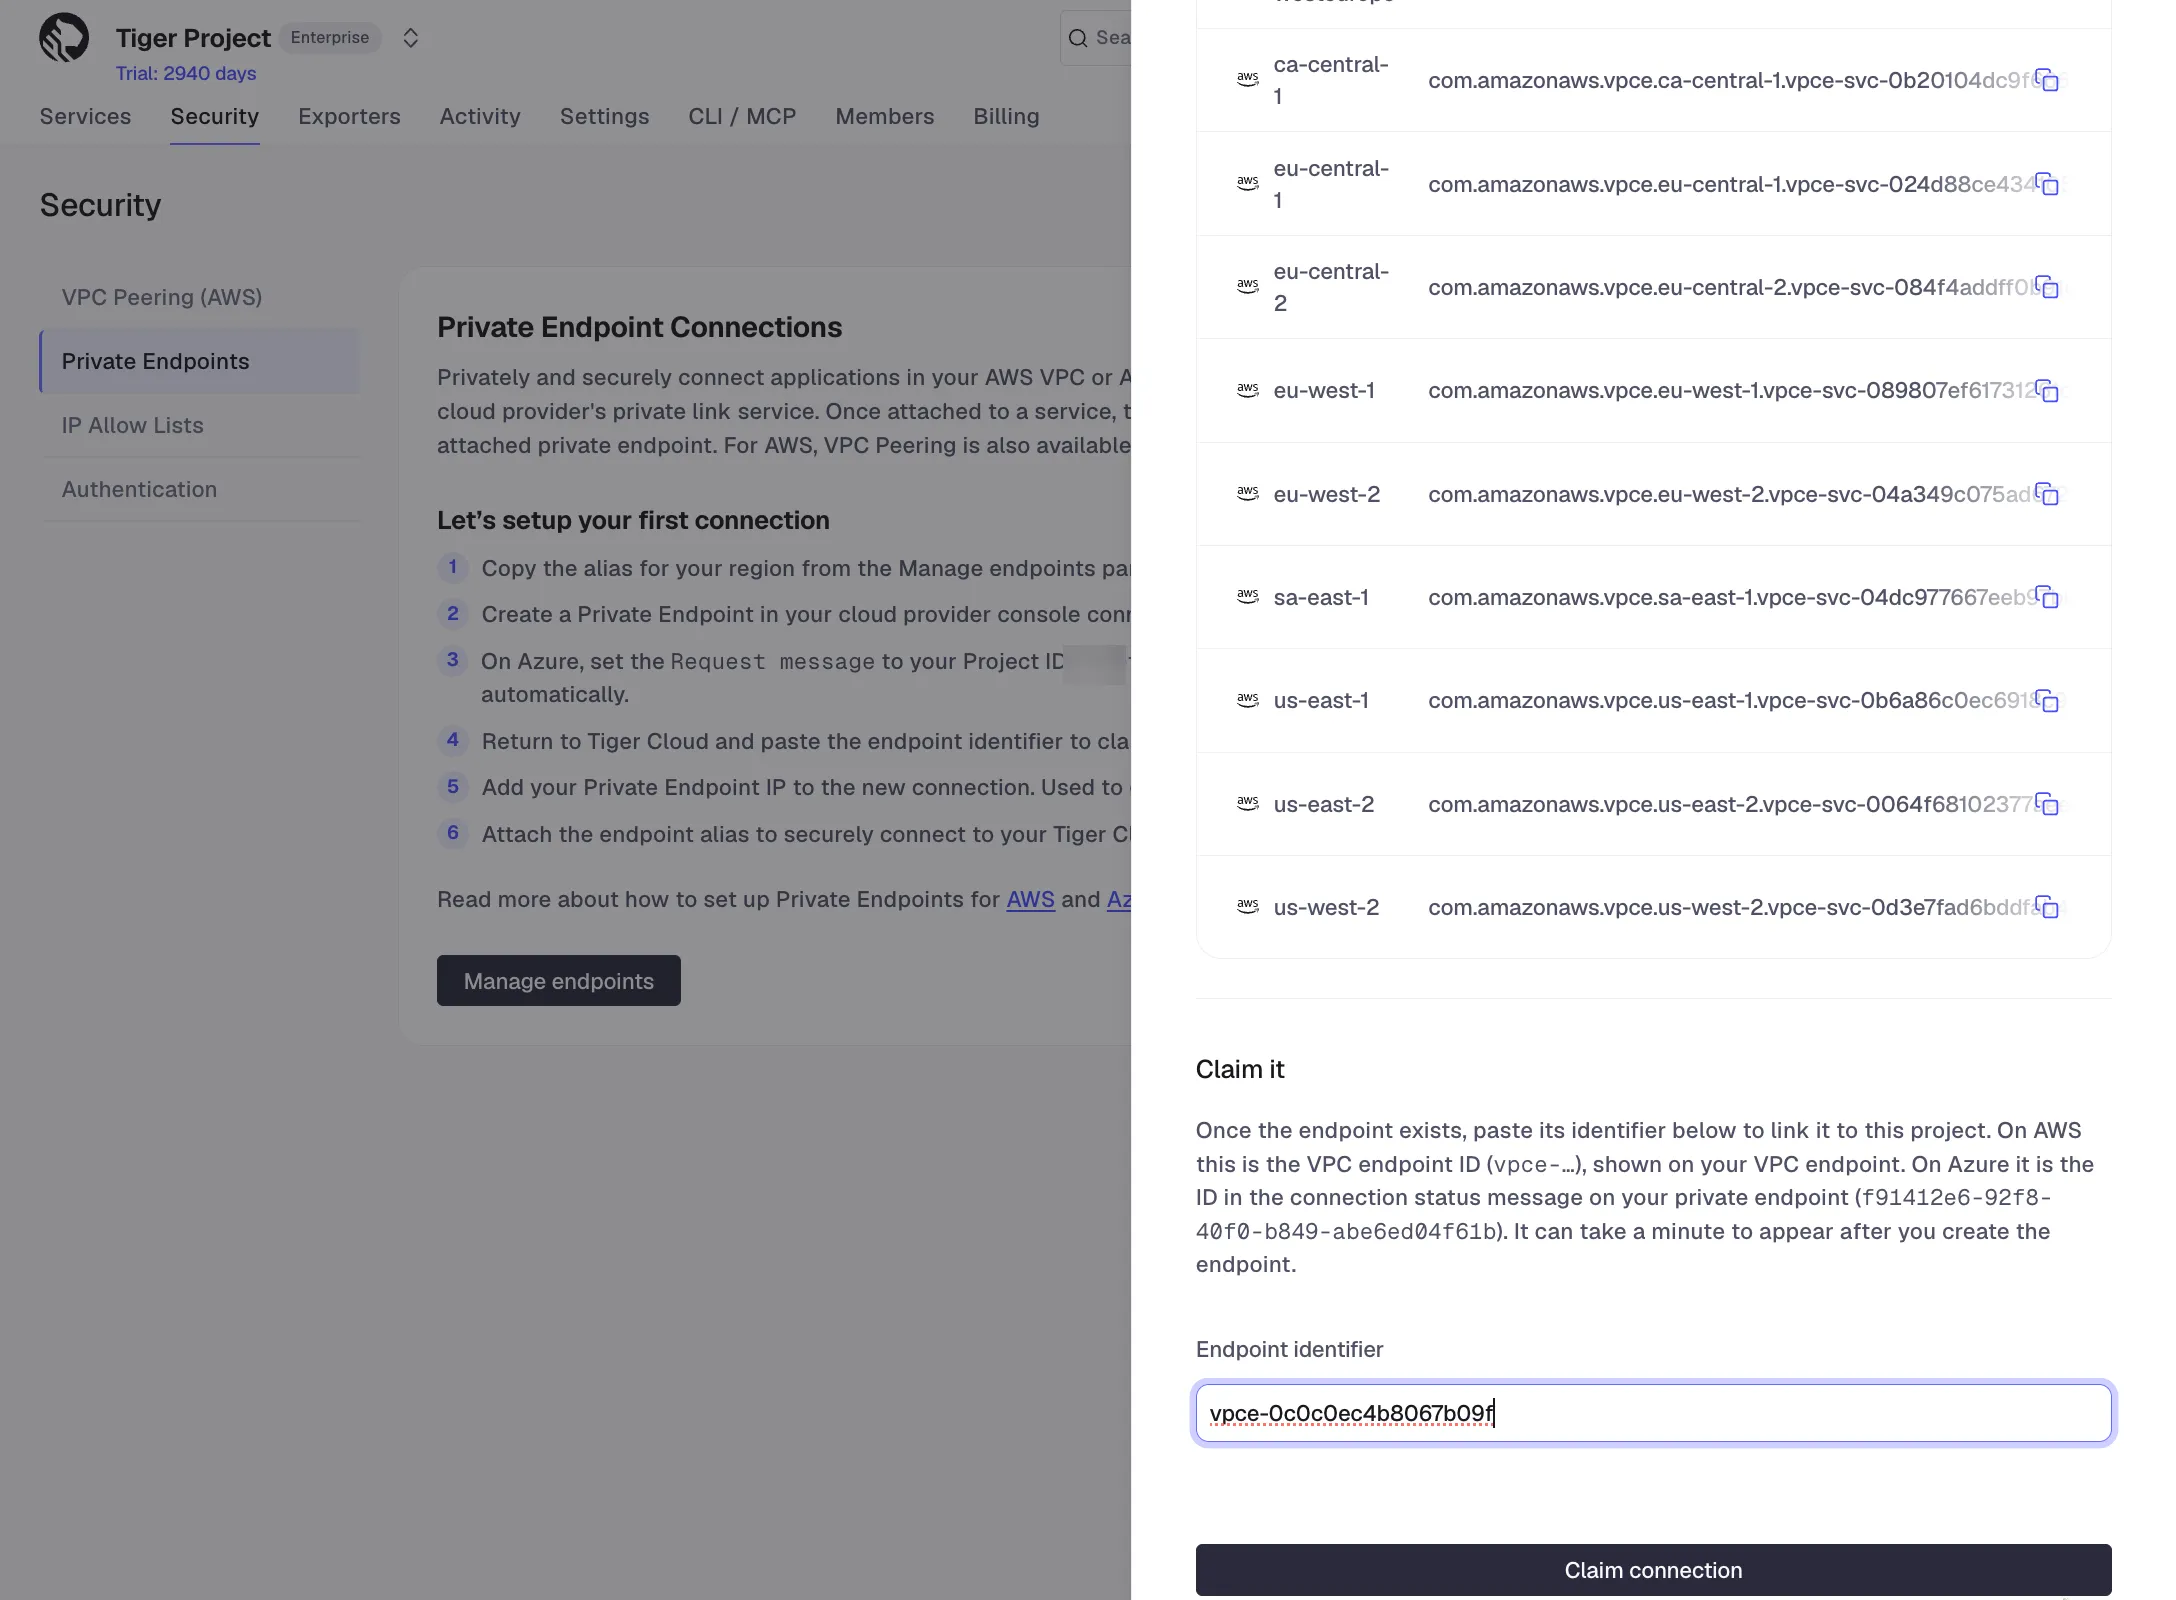 Note
NoteYou can claim a VPC endpoint against one project only.
Your VPC endpoint ID can also take a minute to become claimable after you create the endpoint in AWS.
-
- Configure and attach
-
Under
IP AddressclickAdd IPand paste the private endpoint IP address you have copied from AWS. -
Under
ServicesclickAttach service. Select your service from the dropdown and clickAttach. You can attach a service to one private endpoint.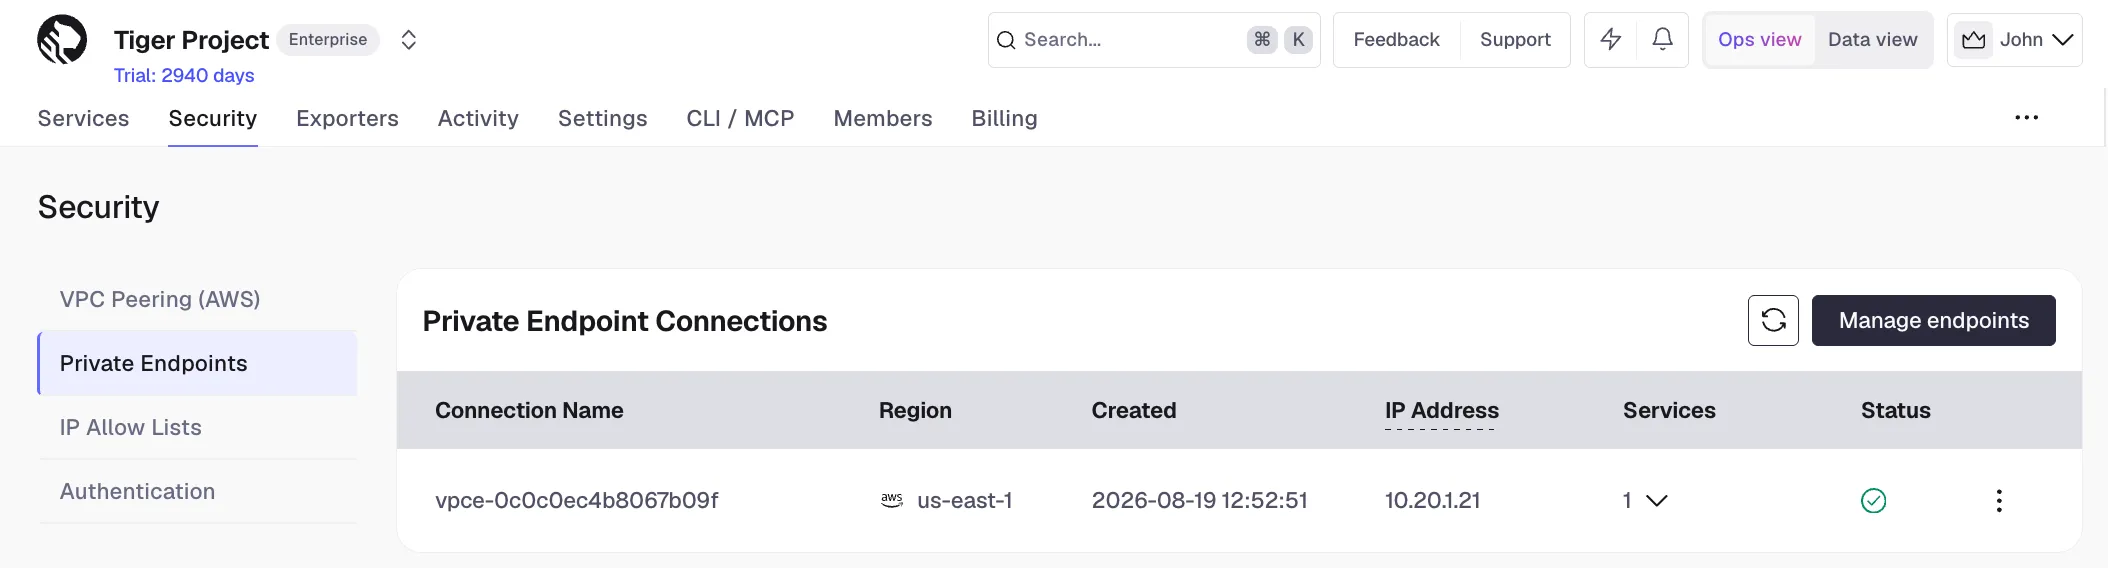
-
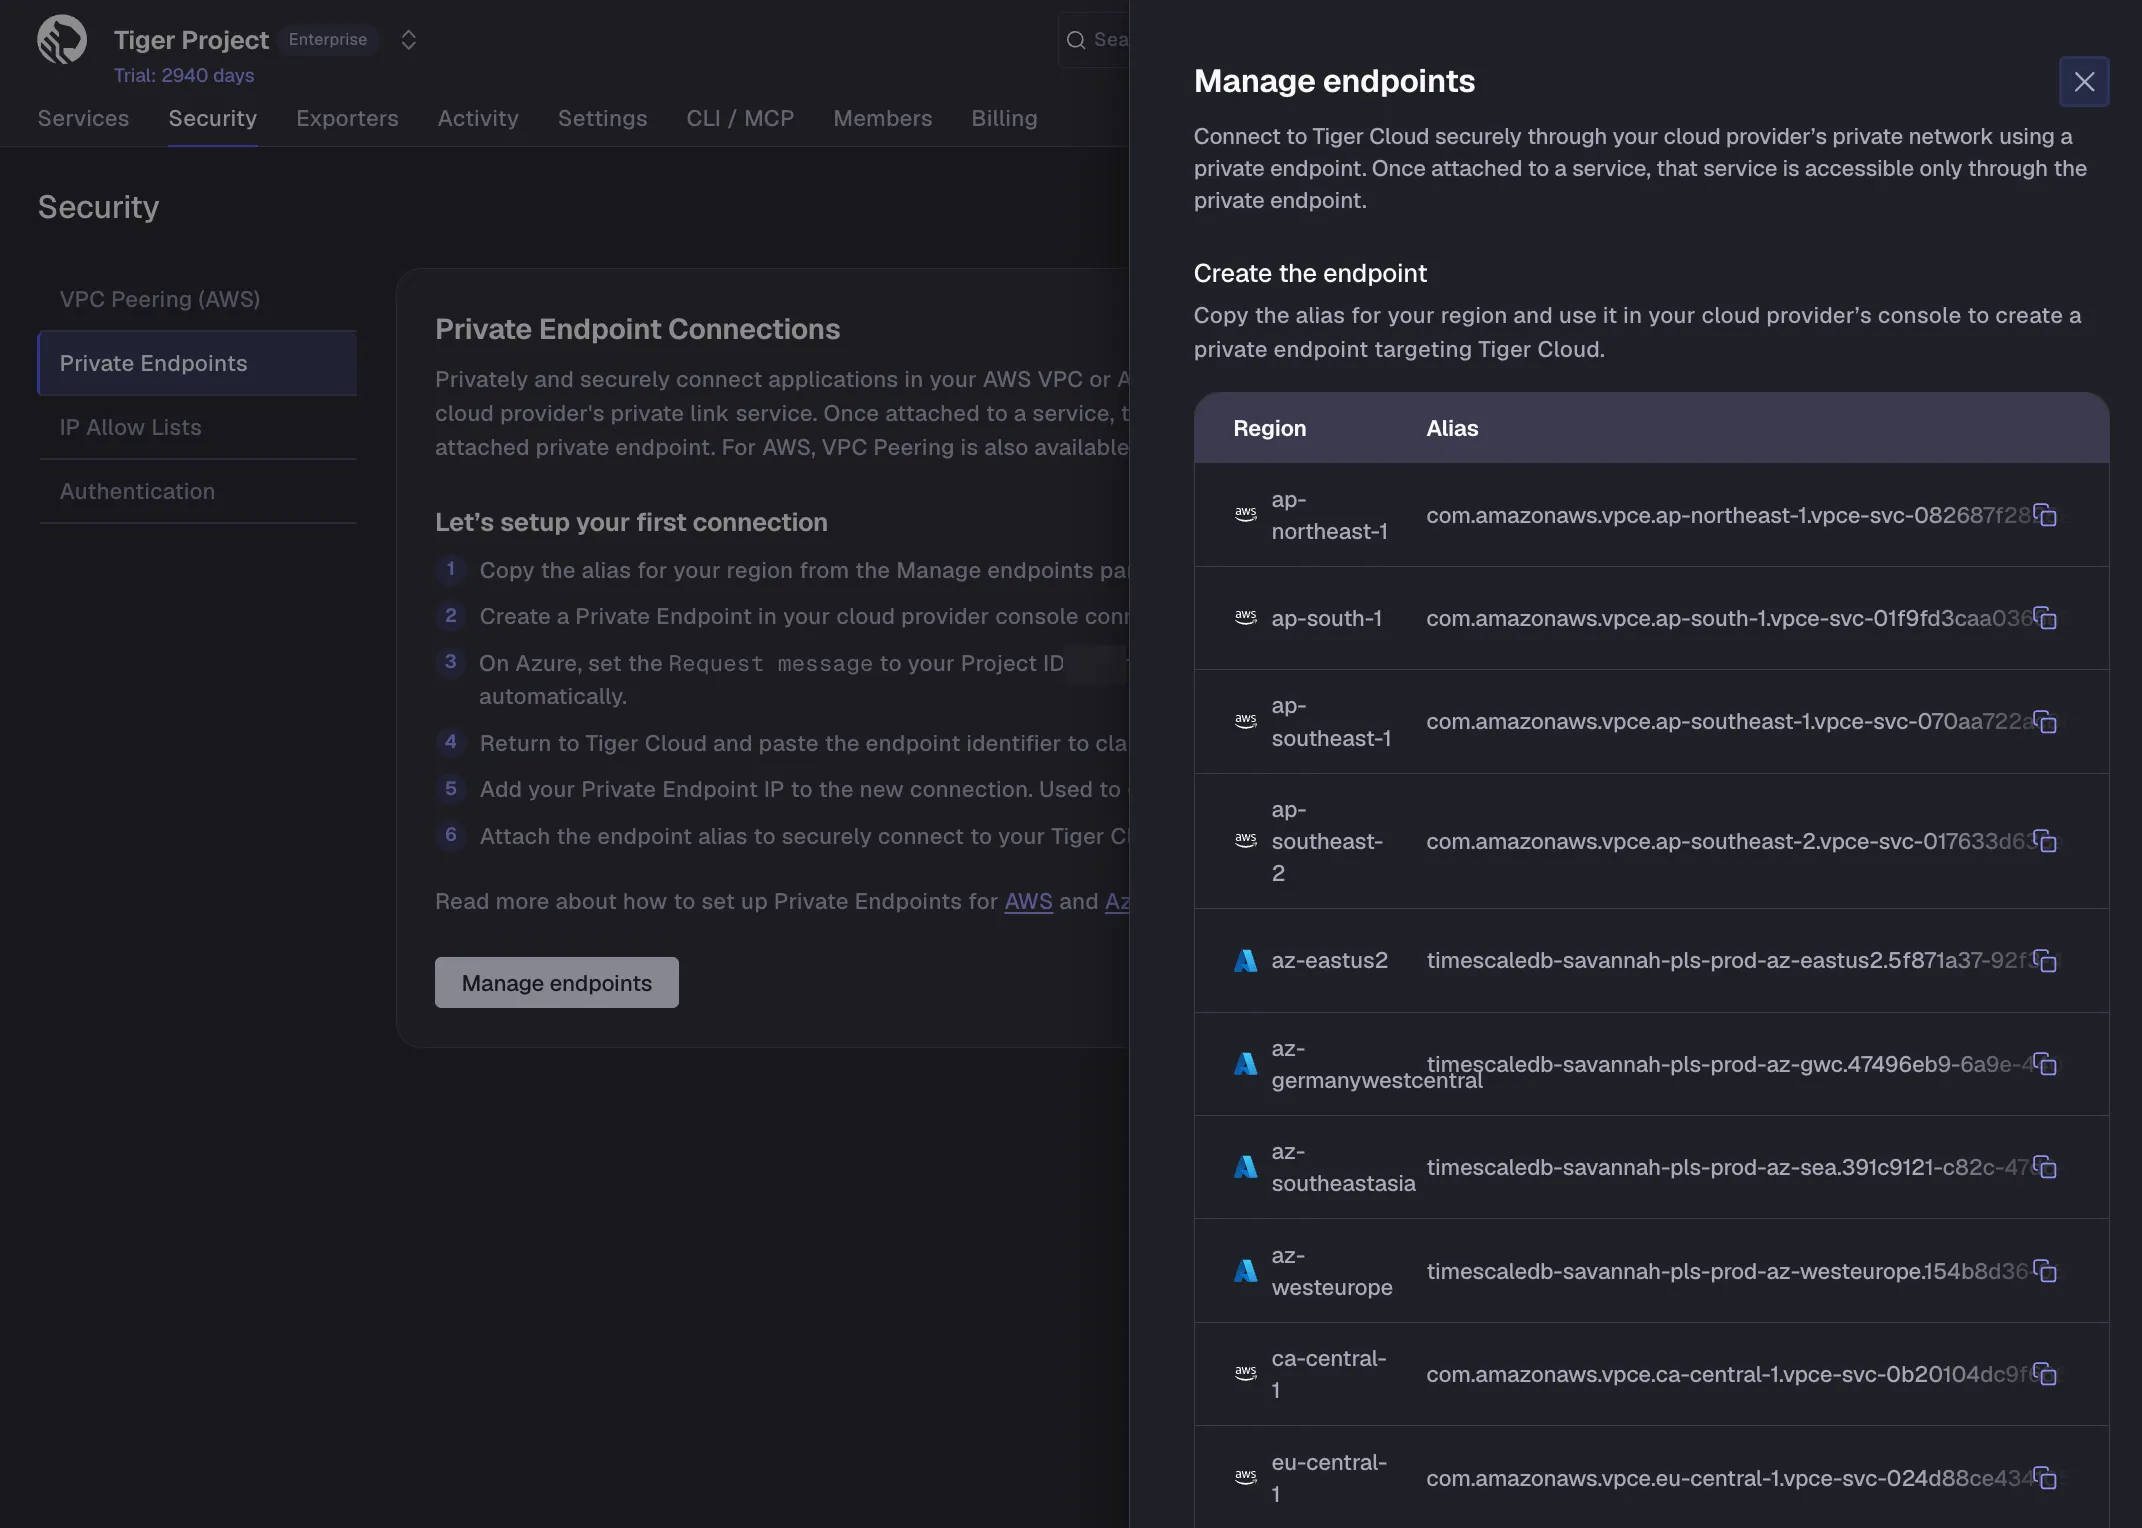
From an EC2 instance inside your VPC, connect to your service using a connection string with your connection details. You should be able to connect successfully.
-
Manage connections
Section titled “Manage connections”- To detach a service from a private endpoint connection, go to
Security>Private Endpoints, expand the arrow in theServicescolumn, and click the trash icon next to the service connection string. - To edit or remove an endpoint connection, go to
Security>Private Endpointsand click the three dots next to the connection in the list. SelectEditorDisconnect, respectively. You need to detach all services from a private endpoint connection before deleting it.